Friday, February 28, 2014

Not Without my Mickey by Tracey Cooley


Hi Creators! Couture Creations Designer Tracey Cooley here today. I am loving the new Secret Treasures and Madeline collections of dies and the Harmony embossing folders that have been recently released! Here are a couple of ideas on how to use them. 

My youngest daughter has just started Primary school and I remembered that I had not created a layout for her first day of Kindy. I remember this day very well as I tried my hardest not to get upset when I dropped her off, but alas, I am a sook and blubbered all the way home. She was so little! Her favorite toy at the time was Mickey Mouse. She was so excited to go to Kindy, but NOT WITHOUT HER MICKEY!


Tip: A great way to add a mat to your lace die-cut is to trace around the edge of the die itself and then cut out the shape with Precision Scissors.


Cut a lace die in an alternate color. Note: I used the Les Fleurs Ornamental Lace Die.


The Circle Nesting Dies are just perfect for making a silhouette of Mickey Mouse! Simply cut one large circle and 2 small circles and voila! Add a bow to one ear to turn Mickey into Minnie.

Flowers: Cut 3 large Retro Flowers and 4 medium Retro Flowers. Ink the edges of the petals if desired. Spritz with water and press center into a mouse pad or molding pad. Note: I used a Sharpie for the large flower and a paintbrush handle for the small flower.


 Once dry, pinch each petal to give a 3D effect. Next adhere layers alternately to form entire blossom.


Leave the larger petals off to make smaller blossom. To make the flowers a little more special, spray with spray adhesive and sprinkle with glitter. If desired, add a Gemstone to finish off the flower center.

I seem to use a certain size of my Self-Adhesive Gemstones more than the others, so I have found a great way to use leftover gemstones to make flourishes. Simply draw a flourish, freehand or with a stencil, and add gems. Try mixing several colors of gemstones.

Keep on Creating!

Couture Creations Supplies:
CO723524 Secret Treasures Collection - Retro Flowers Die
CO723552 Secret Treasures Collection - Bird Song Die
CO723517 Secret Treasures Collection - Party Banner Die
CO723527 Secret Treasures Collection - Classic Chevron Die
CO723534 Secret Treasures Collection - Square Plaque Die
CO723243 Madeline Collection - Les Fleurs Die
CO723040 Circle Nesting Dies
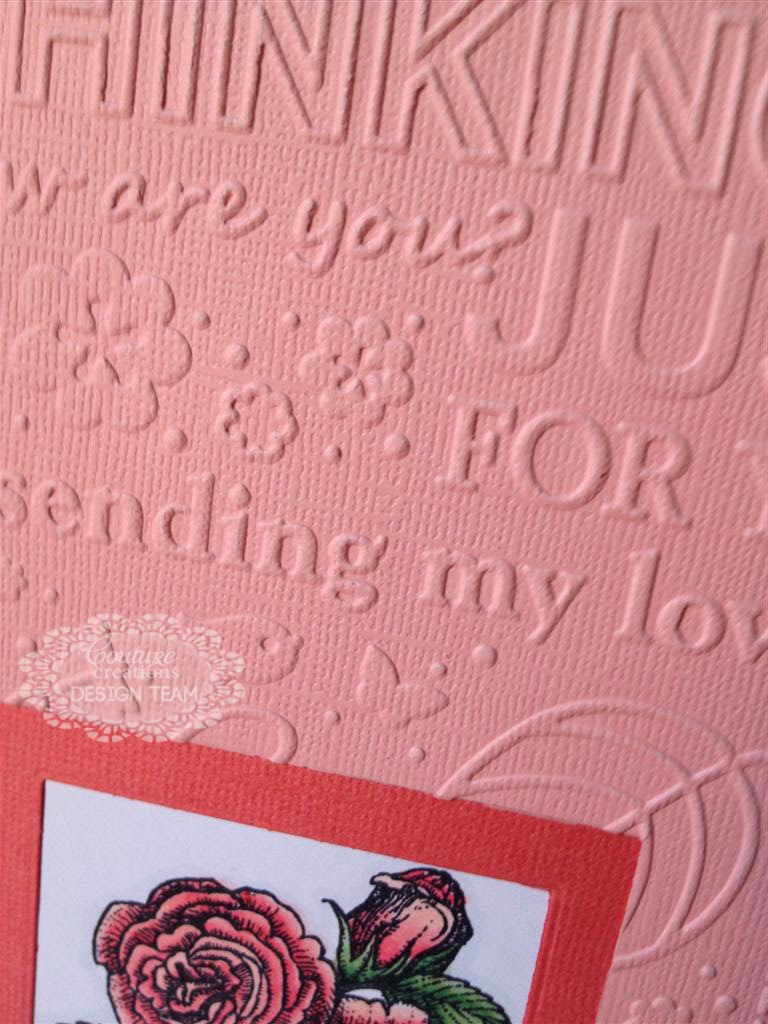
CO723635 Harmony Collection - Journal Cards Embossing Folder
CO721994 Pink Diva Self-Adhesive Gemstones
CO721984 Double-Sided Tape - 12mm
CO721961 Foam Mounting Tape - 12mm


Wednesday, February 26, 2014

Dream Boat Cards by Jo Piccirilli


Hi everyone! Couture Creations Designer Jo Piccirilli here today. I have been playing around with the 3-in-1 Dream Boat Collection that was released late last year. Today I have two cards to share.  Here's my first one using the Butterfly Notes 3-in-1 Set. Let me show you how I created this card.


Using a blending tool to mix your inks over the paper. Keep blending until the desired color is reached.


Next, ink up the stamp from the set and stamp onto the prepared paper.


Note: I stamped the image twice along the bottom and then trimmed the paper to better fit my card.


Using the embossing folder from the set, line up the stamped image inside the folder and run it through an embossing machine.


I used the stamps again on patterned paper and die-cut them out with the dies from the set to create layered embellishments. I used the Circle Nesting Dies to cut my sentiment block and added some Glitzin' Glamour Glitter Glue and Self-Adhesive Pearls to finish the card!

For my next card I decided to keep it very simple but I still think it is striking.


I used the Floral Wreath 3-in-1 Set from the Dream Boat Collection for this card.


Gently swipe across the paper to be stamped with an anti-static cloth. This really does help improve the quality of the embossing. Ink the stamp with Versamark ink and stamp onto white cardstock.


 Pour gold embossing powder over the stamped image.


Use a heat gun to melt the embossing powder.


Using the embossing folder from the set, line up the stamped image inside the folder and run it through an embossing machine.


I used the stamps again on patterned paper and die-cut them out with the dies from the set to create layered embellishments.


I also cut out a smaller flower with the smaller flower die and layered it on top of the larger flower, attaching it to the card with a pearl brad. Stamp a sentiment onto the front of the card, mat on black cardstock and attach to a white card base to finish.

Thanks for letting me share!

Until next time,

Couture Creations Supplies:
CO723400 Dream Boat Collection - Butterfly Notes 3-in-1 Set
CO723402 Dream Boat Collection - Floral Wreath 3-in-1 Set
CO723040 Circle Nesting Dies
CO723041 Scallop Circle Nesting Dies
CO721999 Cafe Creme Self-Adhesive Pearls

Monday, February 24, 2014

Just for You by Patti Hamil


Hi! Patti here today with a sparkly card to share! Purple is my favorite color, so I decided to make a purple card! I used the Cheerful Embossing Folder from the Elegance Collection and the Ivy Decorative Die from the Secret Treasures Collection


Ink the top half of the Cheerful Embossing Folder with purple ink. Note: Make sure to ink the folder really well and to cover it completely.


Trim the excess white cardstock from the edges of the embossed piece.


Next, cover the cardstock with a light shimmery ink.


While the shimmery ink is still wet, apply Ultra Shimmer Embossing Powder and heat to set.


It's hard to see in the photo, but after embossing the cardstock has a really pretty shimmery look.


Use Double Sided Tape to secure the embossed piece to a card base cut from purple cardstock. The Couture Creations tape works wonderfully for heavy pieces like this that tend to "curl" at the edges. The Double Sided Tape keeps the cardstock right in place!


Cut two banners with the Craft Concepts Banners Nesting Dies; the largest banner from purple cardstock and the second largest banner from white cardstock. Outline each banner with a purple marker. Add a handwritten sentiment to the white banner. Adhere the white banner to the purple banner with Double Sided Tape.


For the finishing touches, add a purple flower, three ivy leaves cut with the Ivy Decorative Die and a white bow. Create a similar card with any of the Couture Creations embossing folders. The wide array of patterns are suitable for many occasions!

I hope you liked the card. Thanks so much for visiting!
~Patti

Couture Creations Supplies:
CO723282 Elegance Collection - Cheerful Embossing Folder
CO723531 Secret Treasures Collection - Ivy Decorative Die
CR721244 Craft Concepts Banners Nesting Dies
CO921985 Double Sided Tape

Friday, February 21, 2014

Nautical Card with Vicki Robertson


Hi! Vicki here today sharing some wishful thinking with you! February can't be over soon enough for me. This has been a cold, snowy month in the Northeast and I am thinking of summer, sand and being at the beach. That said, here's a card I created using the Couture Creations Harmony and Secret Treasure Collections of embossing folders and dies.

The card base measures 5 x7 and cut is from kraft cardstock. This is topped with a mat cut from cork specialty paper. Next, I embossed the lighthouse image using the Lighthouse Embossing Folder on natural canvas. The nautical theme is all the rage and this embossing folder is no exception. I gently inked over the embossed image with distress ink to enhance the embossing. A Vintage Gold Gemstone at the top of the lighthouse represents the light.

The Ships Wheel and Anchor Dies from the Secret Treasures Collection are also cut from cork. I adhered the ships wheel directly to the canvas and added black pearls. I gave the anchor added dimension with Foam Mounting Tape and placed it against the ships wheel.

The quote is printed on natural canvas and inked along the edges. I punched a couple of holes and added some yellow twine ties to the pennant shaped tag. The bottom corner is tucked behind the ships wheel while the rest of it is adhered to make it look like it is moving.

I hope you enjoyed my nautical inspiration!

Vicki
He"artful" Validation of Vicki

Couture Creations Supplies:
CO723628 Harmony Collection - Lighthouse Embossing Folder
CO723521 Secret Treasures Collection - Anchor
CO723520 Secret Treasures Collection - Ships Wheel
CO721990 Vintage Gold Self-Adhesive Gemstones
CO723957 Cutting Mat
CO721962 Foam Mounting Double Tape
CO723039 Precision Paper Trimmer

Wednesday, February 19, 2014

Easy Framed Card by Bridget Louw


Hi! Couture Creations Designer Bridget Louw here today with a super quick and easy card.

The card measures 7” high x 5” wide.
The white base layer measures 10” x 7” scored at 5”
The darker pink measures 4 7/8” x 6 7/8”
The lighter pink measures 4 ¾” x 6 ¾”


Using the third largest Square Nesting Die, cut a square from dark pink cardstock. Line up the light pink cardstock over the square cutout and die-cut a larger square using the second largest Square Nesting Die.

You should now have a square window cut out with some of the darker pink showing through like a frame.

Using the Thinking of You Embossing Folder, emboss the light pink layer. Cut some marker blending cardstock with the largest Square Nesting Die. Stamp the image you have chosen on the shape and color as desired. 

The next step is to adhere the colored image behind the square gap in the dark pink layer. On top of that, stick down the embossed light pink layer.

I stamped a sweet sentiment onto a piece of cardstock I had cut using a Victorian Rectangle Nesting Die and glued the sentiment on the inside of the card using Foam MountingTape.
 

Super quick, super easy! I hope you like my card and will try making it with the amazing product range from Couture Creations.
Couture Creations Supplies:
C0723042 Square Nesting Dies
C0723049 Victorian Rectangles Nesting Dies
CO723296 All Occasions Collection -  Thinking of You Embossing Folder
C0721963 Foam Mounting Tape
C0721984 Double Sided Tape
C0721957 Cutting Mat
C0721986 Handheld Essentials
CO723039 Precision Trimmer

Monday, February 17, 2014

THX Card with Dana Tatar


Hi! Dana here today sharing a funky card that I created with the Smooth Embossing Folder from the Couture Creations Fresh and Fun Collection. I think this style of card would be perfect for a teen!


I embossed a piece of white cardstock with the Smooth Embossing Folder and then colored the design with Distress Markers. I then went over the raised edges with a black Distress Marker. I highlighted the wings, the bird and several of the hearts with Crystalina Glitzin' Glamour Glitter Glue. I mounted my colored cardstock onto a black card base and embellished with some patterned paper strips and a chipboard sticker.

Thanks for stopping by today!
~Dana

Couture Creations Supplies:
CO723274 Fresh and Fun Collection - Smooth Embossing Folder
CO721971 Crystalina Glitzin' Glamour Glitter Glue
CO723623 Sponge Dauber
CO721965 Double Sided Tape
CO723039 Precision Trimmer

Friday, February 14, 2014

Heartfelt Banner by Sue Smyth


Hi! Couture Creations Designer Sue Smyth here with you today sharing a little piece of eye candy. I love making banners! This banner could be used for Valentine's Day or for an anniversary.


The large heart panels are die-cut from white cardstock with the Hearts Nesting Dies.


First, die-cut five large hearts from white cardstock using the largest Heart Nesting Die. Ink the edges with red ink. 


For the second layer of the banner, die-cut five hearts from red cardstock with the second largest Heart Nesting Die and then emboss those hearts with the Cheerful Embossing Folder. Rub over the embossed hearts with a pearl paint. Once dry, mount the painted hearts onto the white hearts with Foam Mounting Tape.


Use the Kaleidoscope Die to cut four hearts from pink glitter paper to create the third layer of the banner. Mount each Kaleidoscope heart onto white cardstock and attach to the red hearts with 


Embellish the middle heart with paper flowers. For a shabby finish, dab the flowers with gesso. Add a chip word.


Use the Aurora Vine Die to cut leaves from green cardstock to tuck around the flower cluster. Tip:
Trim the die-cut leaves to create small leaflets that are easier to work with. Add bits of gauze and a resin heart to the flower cluster.


Place eyelets into each side of the hearts. String the banner together with wide organza ribbon embellished with pearls.


Finish the banner by embellishing the Kaleidoscope hearts with Moonlight Self-Adhesive Pearls
and white fiber.

Happy crafting!
~Sue 

Couture Creations Supplies:

CO723530 Secret Treasures Collection - Aurora Vine
CO723409 Endless Dreams Collection - Kaleidoscope Heart
CO723213 Heart Nesting Dies
CO723282 Elegance Collection - Cheerful Embossing Folder
CO721998 Moonlight Self-Adhesive Pearls
CO721962 Foam Mounting Tape