Showing posts with label Self Adhesive Gemstones. Show all posts

Friday, March 28, 2014

Peacock Delight Projects by Adriana Bolzon


Hi! Couture Creations Designer Adriana Bolzon here today sharing how I create my two projects that are featured on the cover of the latest issue of the Couture Creations Creative Inspiration Magazine.

Peacock Pride Instructions

Roughly hand-draw the head and body of a peacock on Dark Blue cardstock. Cut out the figure.

Ink the edges and shadow highlights of the neck and the eye of peacock with a black inkpad and a Sponge Dauber. Highlight the features of the eye and face of the peacock with a fine white pen.

Cut small strips of Orange cardstock and use them to create a crown on the head of peacock. Cut a small beak from Orange cardstock and glue to the end of the peacock face. Place Crystal and Green Envy Self-Adhesive Gemstones to the head of peacock as shown in photograph. Highlight areas with a white pen as shown. Add a Moonlight Self-Adhesive Pearl to the center of the peacock eye.


Punch an assortment of small oval shaped pieces (you can use a small oval nesting die) and leaves from Lime Green and Ocean Blue cardstock. Ink the edges of the oval shapes and leaves with black ink and a Sponge Dauber.

Secure the oval shapes and leaves to the upper part of the body of the peacock with 3D Foam Dots,
layering shapes on top of each other. Place Crystal Self-Adhesive Gemstones on top of the punched shapes.

Peacock Feather Instructions


Cut 25 feathers from both Lime Green and Ocean Blue cardstock using the Peacock Delight Decorative Die.


Place one peacock feather die-cut on top of another peacock feather die-cut, slightly off center, and adhere with glue. Alternate the color of feather on the top.


Use a Sponge Dauber to apply black ink to the edges of each feather. Apply Crystalina and Green Glitzin' Glamour Glitter Glue down the center of each double-layered peacock feather. Let dry. Repeat the above process for each peacock feather. You will require around 25 doubled layered feathers to complete this project.


To create the background of the project, place a stencil on top of black cardstock and gently apply white ink over the stencil using a Sponge Dauber.

Place and adhere the body of the peacock on the black cardstock with 3D Foam Dots. Adhere 3D Foam Dots or Foam Mounting Tape underneath each feather. Arrange clusters of feathers as shown.
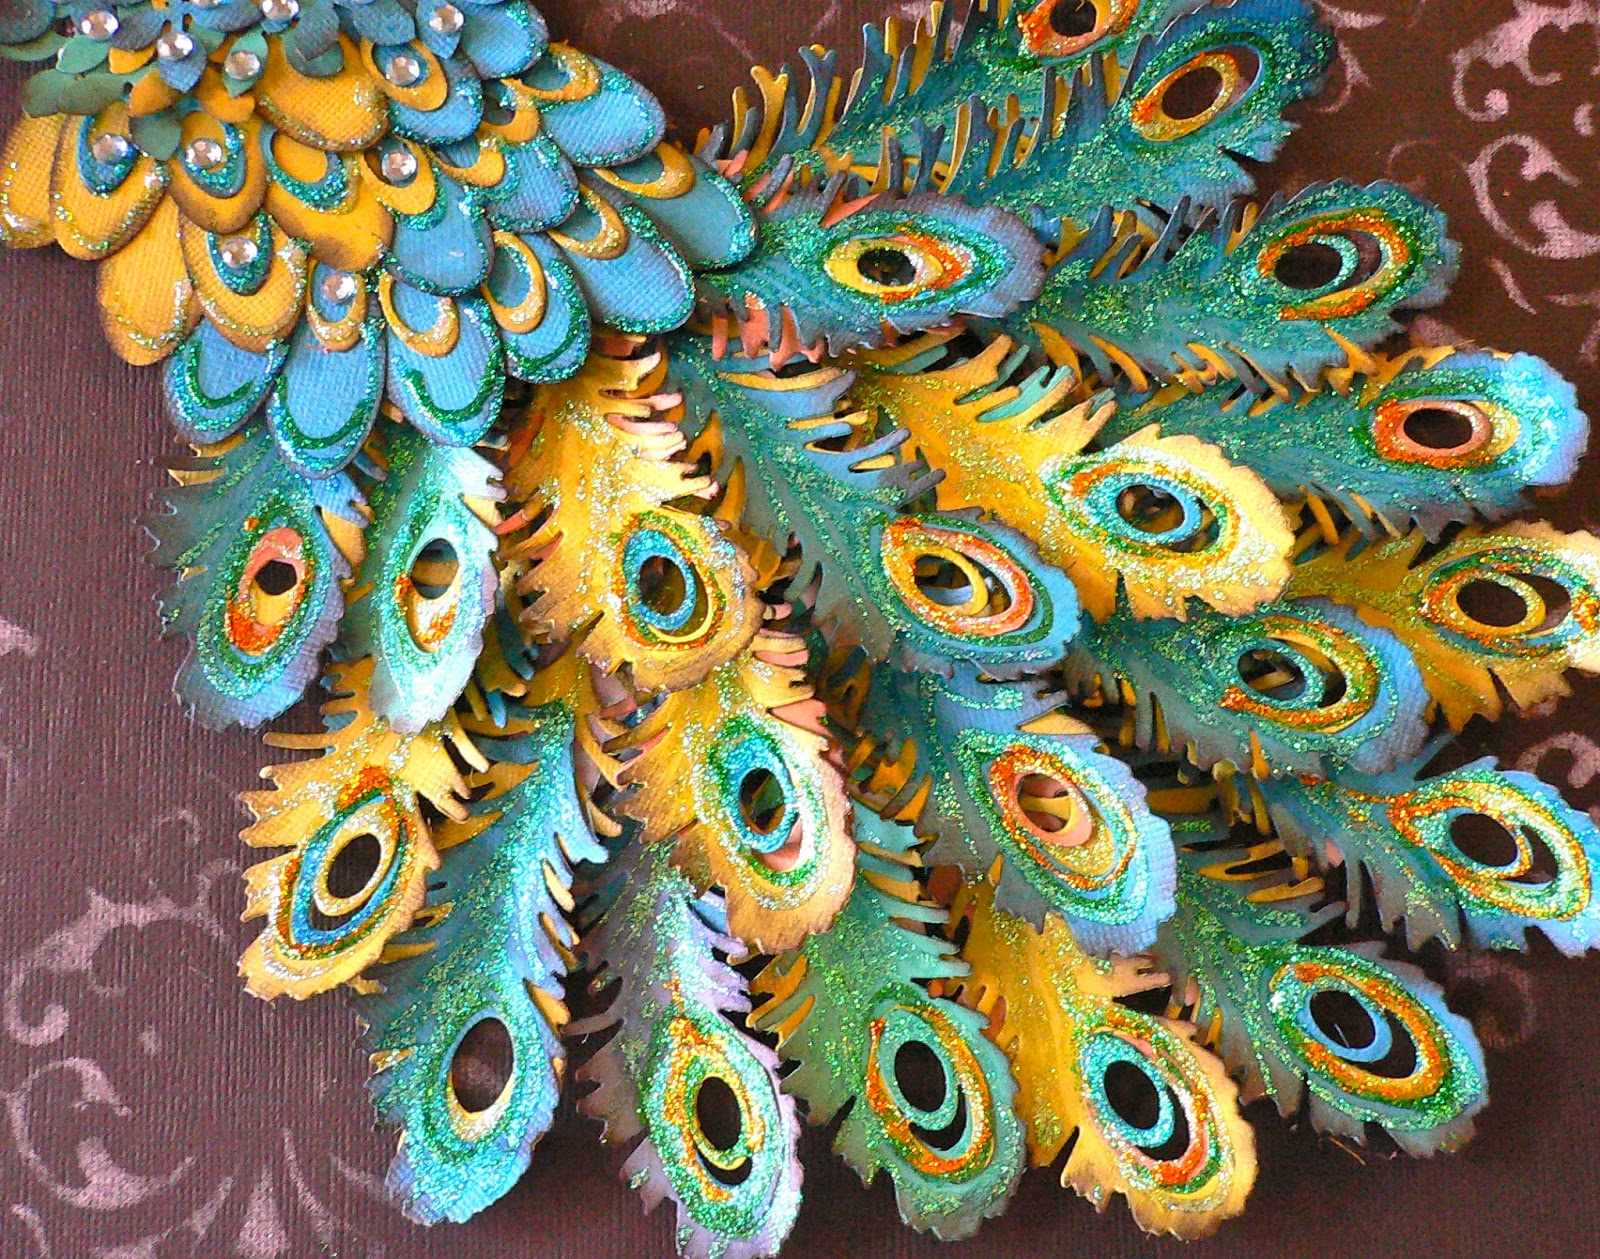


Highlight the edges of the feathers with Green, Gold and Crystalina Glitzin' Glamour Glitter Glue. Let dry.

Couture Creations Supplies - Peacock Pride
CO723707 Glamour Days Collection - Peacock Delight Decorative Die
CO721996 Crystal Self-Adhesive Gemstones
CO721991 Green Envy Self-Adhesive Gemstones
CO721978 Green Glitzin' Glamour Glitter Glue 
CO721971 Crystalina Glitzin' Glamour Glitter Glue
CO721976 Gold Glitzin' Glamour Glitter Glue
CO723780 Foam Mounting Tape
CO723623 Sponge Daubers

Other Supplies: Cardstock, Stencil; Leaf Punch; Oval Punch; Ink; White Pen


Peacock Mask


Peacock Mask Instructions

Use Mod Podge to adhere torn pieces of vintage music paper to a plastic mask. Let dry.

Adhere lace trim and Seaspray and Vintage Gold Self-Adhesive Gemstones to the top section of mask as shown below.


Create 10 doubled layered peacock feathers using the same technique shown in the step-by-step above for the Peacock Pride project.

Arrange a cluster of bird feathers and paper peacock feathers and adhere to each end of mask with Double Sided Tape and 3D Foam Dots.


Create bows with sheer ribbon and layered blue silk flowers with a pearl brad center. Adhere these clusters to each side of the mask.

Create a background with a stencil and a white inkpad, attach the mask to background.


Couture Creations Supplies - Peacock Mask
C0723707 Glamour Days Collection - Peacock Delight Decorative Die
C0721996 Crystal Self-Adhesive Gemstones
C0721990 Vintage Gold Self-Adhesive Gemstones
C0723780 3D Foam Dots
C0721963 Foam Mounting Tape
C0721983 Doubled Sided Tape
C0723623 Sponge Daubers

Thanks for looking!
Cheers, Adriana


Monday, December 9, 2013

Embossed Christmas Tag with Pam Bray


Hi! Pam here today sharing a fun tag. This tag is such an easy one to make, and if you are like me, you will need a lot of tags for the holiday season so why not make them gorgeous?! To begin, gather a scrap of white cardstock, cut into a tag and run it through the Christmas Lyrics Embossing Folder.


Transform this plain white tag into a gorgeous colorful tag using Distress Inks and a Sponge Dauber.


Add a  piece of pretty patterned paper to the top and bottom of the tag, a cute sticker die-cut attached to the tag with some Foam Mounting Tape and some Crystal Self-Adhesive Gemstones.


Don't forget to add some pretty ribbon and some sparkly embellishments to finish the tag. I hope you enjoyed my quick tag! Place them on your Christmas and party packages to make them extra special.

Hugs, Pammejo

Couture Creations Supplies:
CO723607 Wrapped in Joy Collection - Christmas Lyrics Embossing Folder
CO721957 Self Healing Cutting Mat
CO721961 Foam Mounting Tape
CO721956 Precision Scissors
CO721984 Double Sided Tape
CO721996 Crystal Self-Adhesive Gemstones
CO723061 Sponge Daubers

Friday, October 4, 2013

Wrapped In Joy Week - Quick and Easy Trendy Christmas Cards by Gloria Stengel

Hello everyone! Gloria here today sharing a few "trendy" Christmas cards with you for the Wrapped In Joy feature this week. I am on a kick to create cards that are: quick to create, use only basic supplies, and are easy to mail. (Both cards for today are standard size - 5 1/2 x 4 1/4 or A2.) I am not sure I would call myself a "trendy girl" but I thought that these two cards had that "vibe."


For this card, I made a black card base. I then embossed a piece of dark red Core'dinations cardstock with the Jolly Christmas Embossing Folder. I used the Sanding Block to sand the raised areas. The pale paper core shows through. I chose a trendy hexagon print paper to add some extra interest to the card, and I created an icicle border with a punch.


I added a very trendy chalkboard sentiment to the front of the card and finished it all off with a little "bell and bow" action. Clean and simple cards are all the rage these days. I confess that this is a style that I am not very good at, but I think this next card is my own version of CAS.


I embossed some textured glossy paper with the Peaceful Ornaments Embossing Folder. I trimmed off the bottom portion of the embossed image and added Self-Adhesive Gemstones to each of the embossed ornaments.


I added a sentiment, which is one of my very own stamp designs I cut out the sentiment with the Victorian Rectangle Nesting Dies. I rubbed the edges of the rectangle with green ink. I hope you are inspired to create some quick and easy and trendy Christmas cards!

Thanks for joining me today!

Couture Creations Supplies:
CO723595 Wrapped in Joy Collection - Jolly Christmas Embossing Folder
CO723604 Wrapped in Joy Collection - Peaceful Ornaments Embossing Folder
CO723049 Nesting Dies - Victorian Rectangle
CO721993 Red Lust Self-Adhesive Gemstones
CO721956 Sharp Point Scissors
CO721986 Handheld Essentials Tools
CO723061 Sponge Daubers
CO721985 Double-Sided Tape
CO721963 Foam Mounting Tape
CO721957 Cutting Mat
CO723039 Precision Trimmer
CO723060 Sanding Block

Monday, September 2, 2013

Passion Embossing Folder Week - Gelato Watercolor Effect with Dana

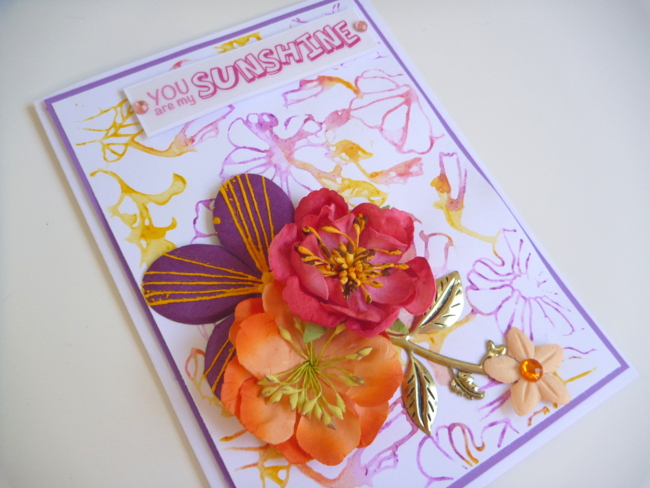
Welcome to the Passion Embossing Folder Feature Week! We're highlighting projects created with the gorgeous Couture Creations Passion Embossing Folder every day this week. Each member of the CSW Distributors Design Team has created a card using the Passion Embossing Folder and we can't wait to share our designs with you. To start the week off, we're sharing a card tutorial! Enjoy!


Hi! Dana here today sharing a fun technique using the Passion Embossing Folder, from the Couture Creations Fine Designs Collection, and Faber-Castell Design Memory Craft Gelatos to create a beautiful watercolor effect.


Step One: Gather several colors of Gelatos, a piece of white cardstock, a mister filled with water and the Passion Embossing Folder.


Step Two: Lightly mist the back inside portion of the Passion Embossing Folder with water and apply Gelatos color to the raised floral pattern. Note: I used Raspberry, Watermelon, Metallic Melon and Banana Gelatos.


Step Three: Carefully place a piece of white cardstock on top of the colored side of the embossing folder, fold the top half of the embossing folder down and apply pressure to transfer the color to the cardstock.


Step Four: Remove the cardstock from the embossing folder and set aside to dry. Trim the cardstock to fit onto a card base and embellish to finish.


Thanks for stopping by today! Please stop by every day this week for more projects featuring the Passion Embossing Folder!

~Dana

Couture Creations Supplies:
CO723251 Fine Designs Collection - Passion Embossing Folder
CO721995 Pink Flamingo Self Adhesive Gemstones
CO721963 Foam Mounting Tape