Showing posts with label Tatted Lace Doily Die. Show all posts

Friday, July 26, 2013

Pretty in Pink Card with Gloria Stengel

Hello everyone! It is Gloria Stengel with you today. I have used one of the new doily die templates to make a "pretty in pink" card for you.


1. Create a 5 x 5 inch white card.

2. Trim printed paper to 4 7/8 x 4 7/8 inches and attach to card front.


3. Using the Tatted Lace Doily Die (Fantasia Collection), cut and emboss pink cardstock. You may need to use the Piercing Tool to remove some of the tiny bits from the die cut. (My die did not come with injection foam. To aid the removal of the paper, I placed a sheet of wax paper between the die and my cardstock. This helped me remove the die cut shape from the paper without tearing it.)

4. Attach the square doily shape to the center of the card. Wrap a length of pink ribbon around the center of the panel and secure.


5. Using the Scallop Rectangle Nesting Dies, cut a rectangle from dark pink cardstock.

6. Stamp sentiment with black ink onto white cardstock. Line the Rectangle Nesting Die template over the stamped sentiment and tape down.

7. Cut and emboss both shapes.

8.Using Foam Mounting Tape, attach the sentiment stack to the center of the card, overlapping the ribbon.


9. Tie two bows, one from pink ribbon and one from dark pink ribbon and glue them to the right of the sentiment. Top with a paper rose.

10. Stamp a sentiment onto white cardstock. Use the oval die from the Picture Frame Nesting Die to cut out the sentiment. Using a Sponge Dauber and pink Distress Ink, add color to the sentiment. Tuck the sentiment under the right edge of the ribbon bows.


Thanks for joining me today!

Couture Creations Supplies:
CO723046 Rectangle Nesting Dies
CO723047 Scallop Rectangle Nesting Dies
CO723215 Picture Frame Nesting Dies
CO723223 Tatted Lace Doily Die
CO721956 Sharp Point Scissors
CO721986 Handheld Essentials - Piercing Tool, Embossing Tool
CO723061 Sponge Dauber
CO721965 Double-Sided Tape
CO721963 Foam Mounting Tape
CO721957 Cutting Mat

Saturday, June 29, 2013

Happy Trails with the Couture Creations Tatted Lace Doily Die

Hi, Kerrie Gurney here with a step by step tutorial for CSW Distributors using the Couture Creations Tatted Lace Fantasia Doily Die and Couture Creations Embossing Folders.

Cut a piece of patterned paper to 12" x 7," cut the bottom into a scroll shape, distress the edges, ink with black ink pad and adhere to the base cardstock.


Die-cut the Tatted Lace Doily Die from patterned paper. Notice how easy the paper comes away from the die using Couture Creations Ejection Foam on the die.


Cut the Tatted Lace doily in half diagonally.


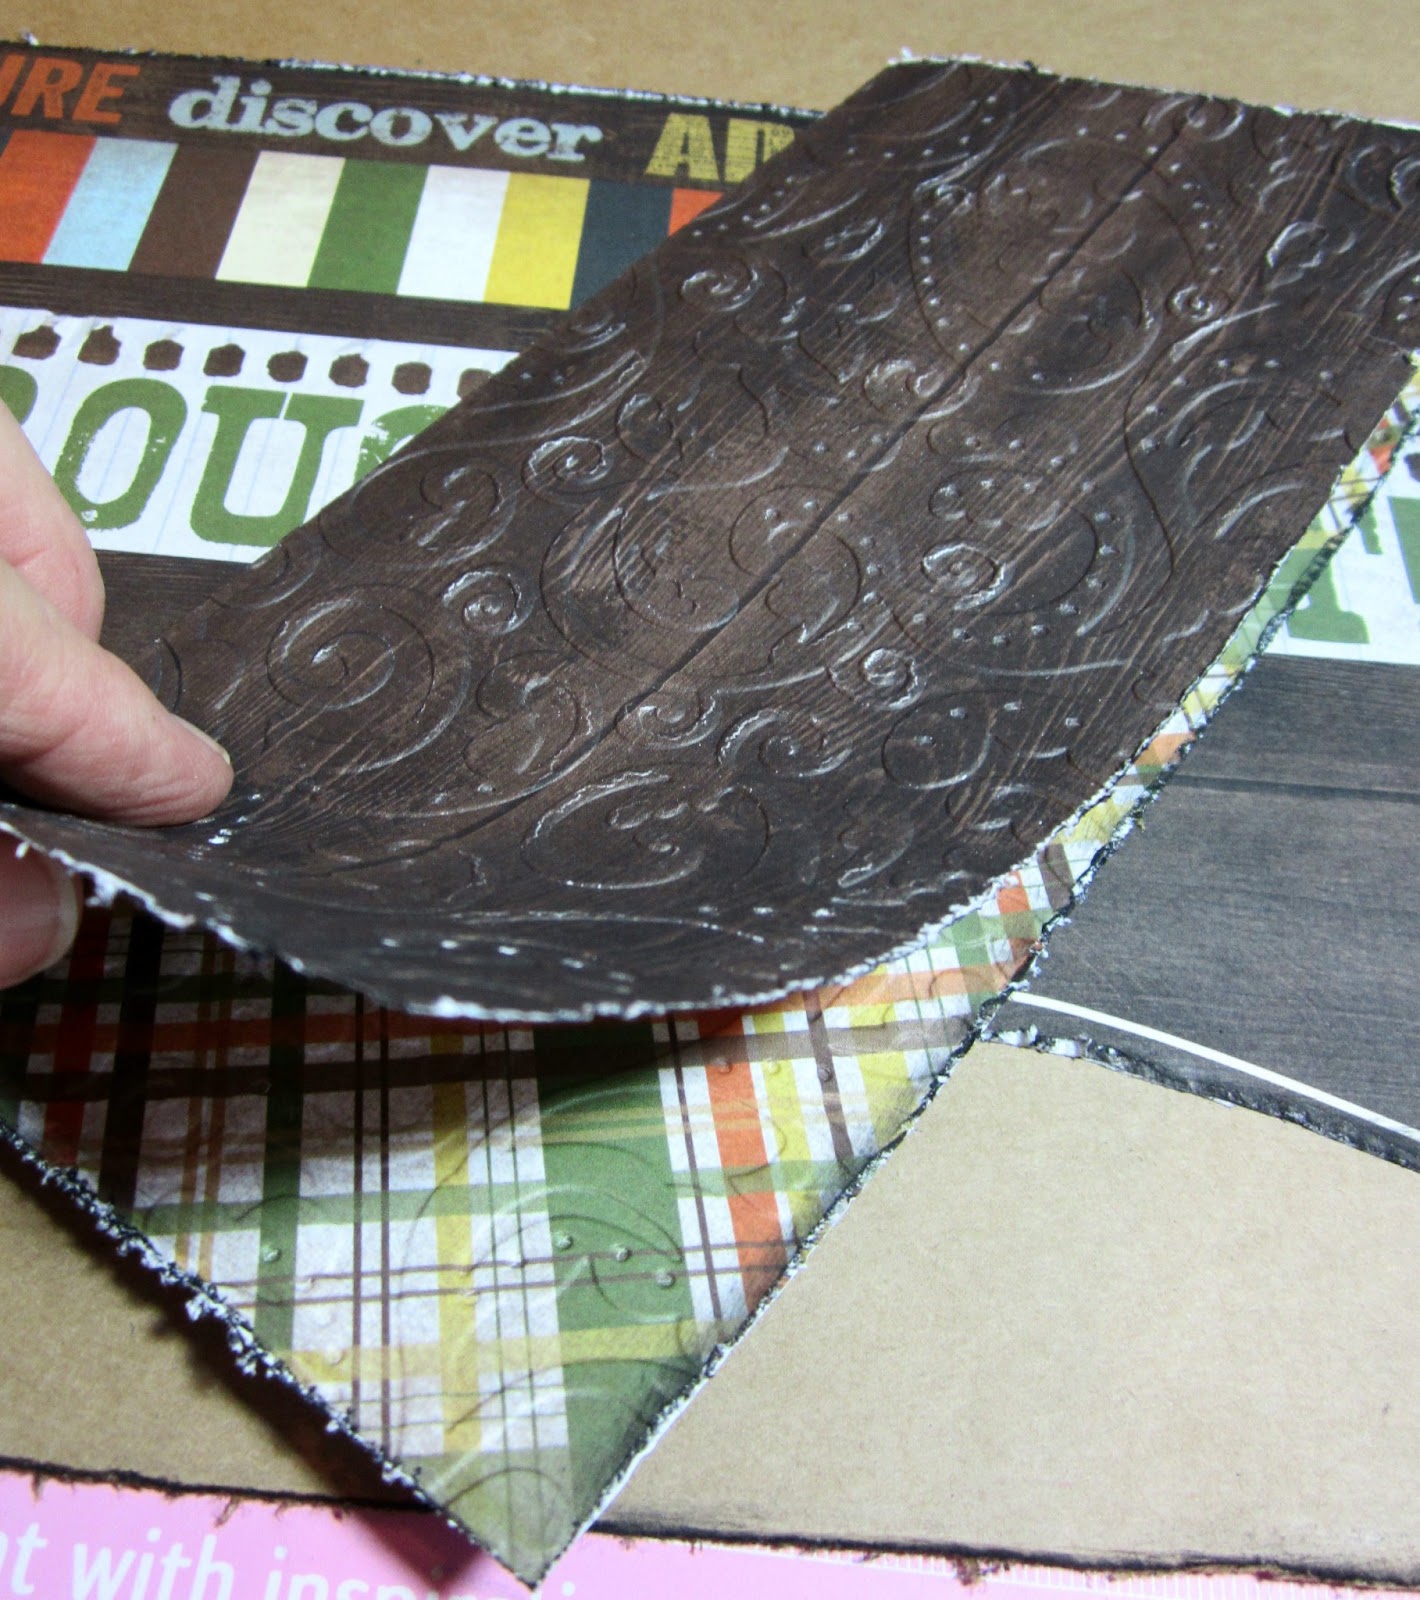
Cut a piece of patterned paper to 8" x 8," distress the edges and ink. Fold in half, and place the patterned paper into the Extra Confetti Embossing Folder, from the Elegance Collection, and run through machine.

Turn the patterned paper around and emboss the end piece. This will give your patterned paper some texture. One side will be embossed and one side will be debossed, adding more interest to your background.

Unfold the patterned paper and adhere to your page.


Cut a piece of cork to 1.5" x 12" and emboss using the Magical Embossing Folder from the Fresh & Fun collection.  Lightly rub a black ink pad over the surface of the cork strip to highlight the embossed pattern.


Adhere to cork strip to the page using Couture Creations Double Sided Tape.


Adhere both halves of the Tatted Lace doily to your page. Adhere the photo to the page using Couture Creations Foam Mounting Tape on only 3 sides of the photo, leaving the top open to slide in a 4" x 6" journaling tag.


Add Couture Creations Cafe Creme Pearls under the cork strip to finish the page.


Couture Creations Supplies:
CO723223  Fantasia Tatted Lace Doily Die
CO723446  Elegance Extra Confetti Embossing Folder
CO723279  Fresh and Fun Magical Embossing Folder
CO721000  Cafe Creme Pearls
CO721966  Tape Cutter
CO721961  Foam Mounting Tape - 12mm x 4m
CO721984  Double Sided Tape - 12mm x 50m

I hope you have enjoyed this tutorial! Happy Creating!

Kerrie