Showing posts with label Fresh & Fun. Show all posts

Monday, February 17, 2014

THX Card with Dana Tatar


Hi! Dana here today sharing a funky card that I created with the Smooth Embossing Folder from the Couture Creations Fresh and Fun Collection. I think this style of card would be perfect for a teen!


I embossed a piece of white cardstock with the Smooth Embossing Folder and then colored the design with Distress Markers. I then went over the raised edges with a black Distress Marker. I highlighted the wings, the bird and several of the hearts with Crystalina Glitzin' Glamour Glitter Glue. I mounted my colored cardstock onto a black card base and embellished with some patterned paper strips and a chipboard sticker.

Thanks for stopping by today!
~Dana

Couture Creations Supplies:
CO723274 Fresh and Fun Collection - Smooth Embossing Folder
CO721971 Crystalina Glitzin' Glamour Glitter Glue
CO723623 Sponge Dauber
CO721965 Double Sided Tape
CO723039 Precision Trimmer

Monday, January 20, 2014

Mitten Wall Hanging with Dana Tatar


Hi! Dana here today sharing a wall hanging. I'm ready for Spring, but until then, I thought I would cozy up my scrap space with a pair of mittens. The Powder Puff Embossing Folder, from the Couture Creations Fresh and Fun Collection, added a fun frosty pattern to my mittens.


I embellished each mitten with ribbon, flowers and a die-cut and then added some sparkle with Moonlight Self-Adhesive Pearls and Crystalina Glitzin' Glamour Glitter Glue.

Thanks for stopping by today!
~Dana

Couture Creations Supplies:
CO723278 Fresh and Fun Collection - Powder Puff Embossing Folder
CO721998 Moonlight Self-Adhesive Pearls
CO721971 Crystalina Glitzin' Glamour Glitter Glue
CO723039 Precision Trimmer

Friday, November 22, 2013

Peachy Paper Piecing Layout with Dana Tatar


Hi! Dana Tatar here with you today sharing a layout that features the Dream Embossing Folder from the Couture Creations Fresh & Fun Collection. Every once in awhile, the scrappy planets align, and I'm able to assemble a layout where the page elements coordinate in a fantastic way. As soon as I saw the Dream Embossing Folder, I immediately knew where to find the piece of patterned paper in my stash that was almost a perfect match!


I had a lot of fun piecing together this colorful embossed design to complement my patterned paper!


I selected three colors of Core'dinations cardstock to match my patterned paper and embossed each of them with the Dream Embossing Folder.


I cut the circles, steams and leaves from the colored cardstock with my Sharp Point Scissors and glued them to a piece of white cardstock that I also embossed with the Dream Embossing Folder.


I used the Celestial Doily Die from the Fantasia Collection to cut some pretty doilies for my layout. I love that this die cuts two doilies at once! I cut the larger lace doily in half and used the pieces to frame my photo.


I used the smaller doily as a journaling spot.


For a finishing touch, I mimicked the dotted print along the stems on my patterned paper around the stems of my flower clusters with Vintage Gold Self Adhesive Gemstones.

Thanks so much for stopping by today!
~Dana

Couture Creations Supplies:
CO723277 Fresh & Fun Collection - Dream 5x7 Embossing Folder
CO723220 Fantasia Collection - Celestial Doily Die
CO721990 Vintage Gold Self Adhesive Gemstones
CO721961 Foam Mounting Tape
CO721956 Sharp Point Scissors
CO721957 Cutting Mat

Monday, November 4, 2013

Sophia Die Week - Dance by Cathi O'Neill


Hi! Cathi O'Neill here today with you sharing a layout for the Sophia Die feature this week. All she wants to do is dance! I have that Don Henley 80s song running through my head now! My daughter is addicted to ballet, and as she goes up grades, her teacher has encouraged her. She wants to be a professional dancer and it is great to see her so passionate about something. It is a competitive world but if she is serious about this, we will be here to help her along. (Though the idea of long distances travelled for all of this is something I wouldn't mind not having to do, lol!)

This layout showcases some of the new Sophia Intricutz Dies. I just love the amazing flourishes in the Sophia collection. I chose to use the Lanvin Die and the Stella Die, cutting them out on white cardstock and misting them with Shimmerz sprays.


I used the Fresh and Fun Magical Embossing Folder for the background paper for the fussy cut image of my daughter. I used the Couture Creations Sanding Block to bring up the pattern.


Next, I took the Fantasia Collection Dazzling Doily Die and cut it out of white cardstock. I cut the doily in half and inked it with Walnut Stain Distress Ink using the Couture Creations Sponge Daubers.


I then started layering the papers for the layout, putting down the embossed cardstock first and the lace, tucking the doilies underneath and arranging the flourish die cuts on top. I then took my fussy cut photo of my daughter secured it to the page using 12mm Foam Mounting Tape.


I added several pieces of ballet themed chipboard from Molossi and a few flowers, and placed the photo there in the scene. I got my inspiration for this type of layout from the gorgeous work of Britt Sviggum and really wanted to try it!


I added some molding paste through a damask stencil, some gorgeous script and crackle pattern stamping and bright mist to finish the page. I had a lot of fun making this!


Thanks for stopping by today!
~Cathi

Couture Creations Supplies:
CO723279  Fresh and Fun Collection - Magical Embossing Folder
CO723483  Sophia Collection - Stella Die
CO723482  Sophia Collection - Lanvin Die
CO723225 - Fantasia Collection - Dazzling Doily Die
CO723060 - Sanding Block
CO723061 - Sponge Daubers
CO721961 - 12mm Foam Mounting Tape

Wednesday, October 16, 2013

Dream Layout with Patti Hamil

Hi! Patti here today sharing a layout of my beautiful Granddaughter that I created using the Super Powder Puff Embossing Folder from the Couture Creations Fresh & Fun Collection. This design is such a super fun folder to play with. For this page I decided to add some color! I also added LOTS of layers!


Here is what I started with.


I colored in the designs with four pastel colored markers; green, pink, yellow and blue. I just used my Zig markers for this, which was really easy since the embossed area is so well defined.


Below you can see the cuts made with the Square and Scalloped Square Nesting Dies, which I layered underneath the photo using Foam Mounting Tape to add extra dimension to my page.


I used the Kaleidoscope Heart Die with three colors of cardstock. I backed each heart die-cut with cream cardstock to complement the little yellow fans I tucked behind each embossed square. I added Pink Diva Self-Adhesive Gemstones to the tip of each scalloped square framing my photo and some Crystalina and Pink Glitzin' Glamour to the flowers for some extra sparkle.


To finish the layout I added a tiny yellow rose at the bottom of each fan and a dream sticker sentiment.


This layout was so much fun to create and I hope you liked seeing it! Don't be afraid to add lots of layers and dimension to your pages. It really makes them come alive! Thanks so much for stopping by today!

~Patti

Couture Creations Supplies:
CO723441 Fresh & Fun Collection - Super Powder Puff Embossing Folder
CO723409 Endless Dreams Collection - Kaleidoscope Heart Die
CO723042 Square Nesting Dies
CO723043 Scallop Square Nesting Dies
CO721994 Pink Diva Self-Adhesive Gemstones
CO721971 Crystalina Glitzin' Glamour
CO721969 Pink Glitzin' Glamour
CO721961 Foam Mounting Tape

Friday, September 20, 2013

Smile with Pam Bray


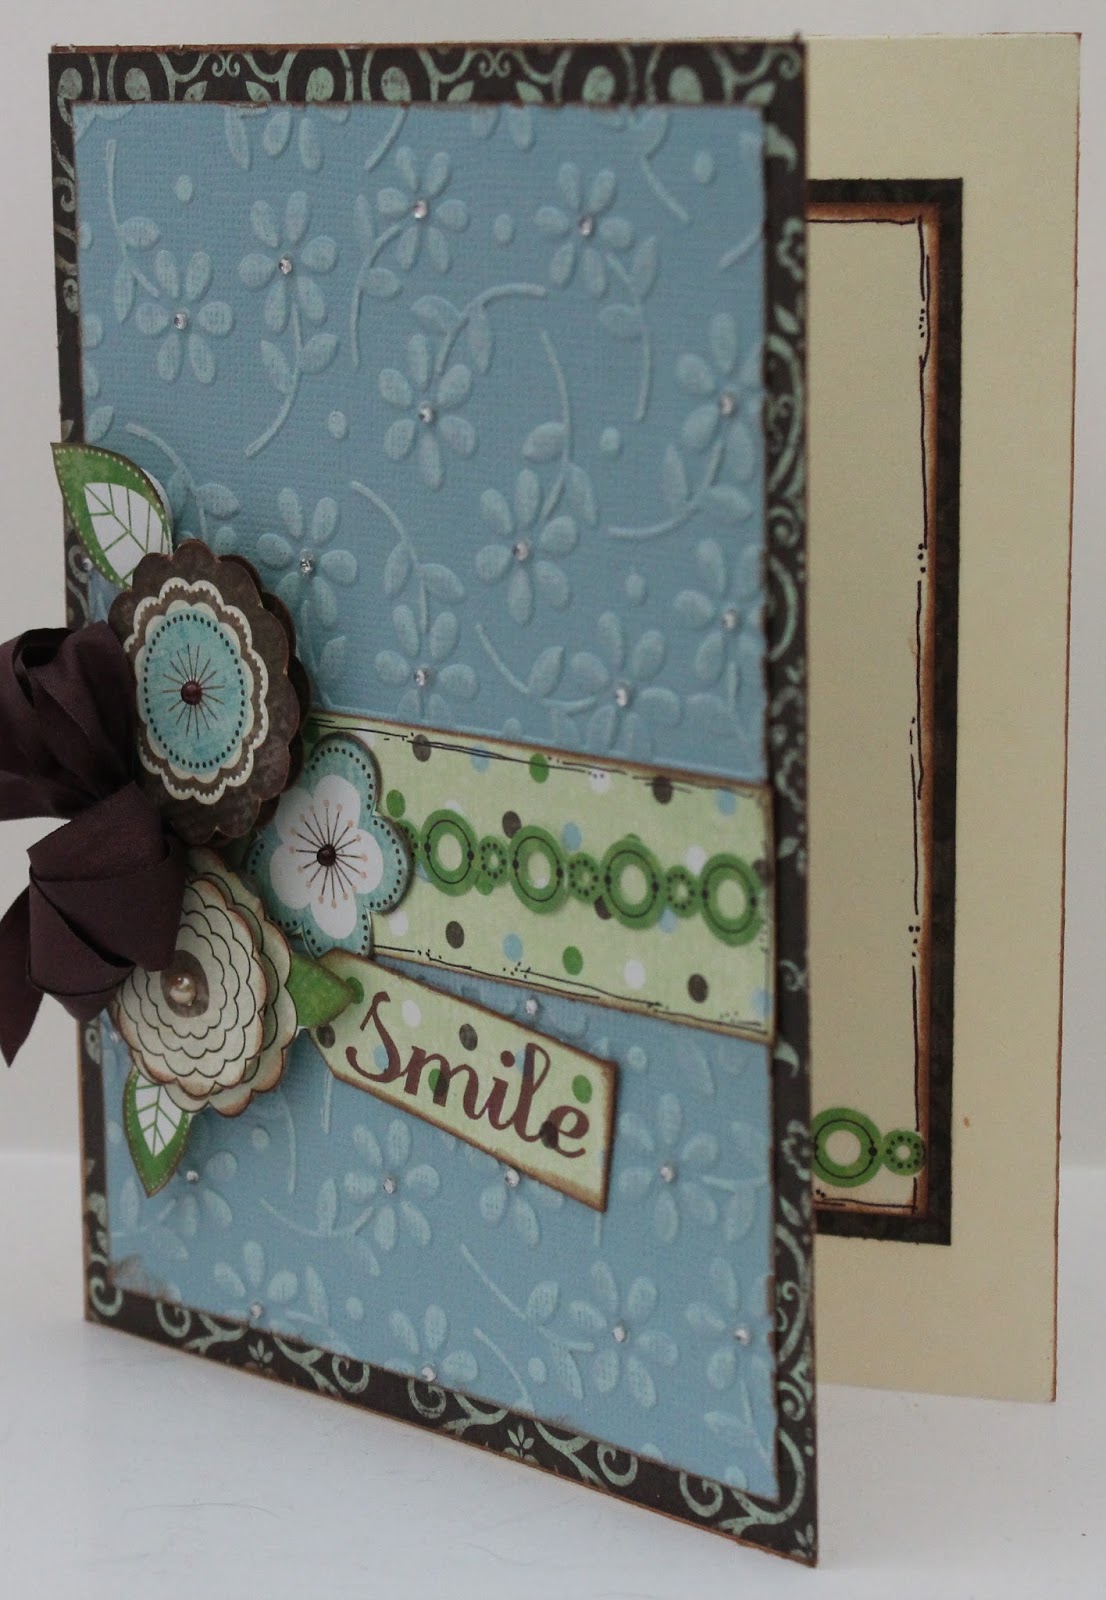
Hello! Pam here today sharing with you my "Smile Card" using the Couture Creations Petal Pleasures Embossing Folder from the Fresh & Fun Collection. To begin with I went to the archives of my mass paper stash and found some Bo Bunny papers that I had forgotten about....I am sure if you are a paper crafter/scrapbooker you understand what I mean by the "archives" of paper stashes....anyway...I began by placing my patterned paper on top of a 4" x 5 1/2" piece of kraft paper.


I ran my Couture Creations Petal Pleasures Embossing Folder through my die-cutting machine using Core'dinations Color Core Cardstock. Once I had accomplished this, I sanded it lightly with my Couture Creations Sanding Block, and adhered it to the top of my paper with my 1/4" Double-Sided Tape. I placed small Clear Gemstones from Couture Creations in the centers of each of my flowers.


Add a fun strip of coordinating patterned paper and a sticker border to the center of the Petal Pleasures cardstock prior to placing your fussy cut flowers on to your card front with Couture Creations Foam Mounting Tape.

I hope you enjoyed my card today and that it made you smile.
Hugs, Pammejo

Couture Creations Supplies:
CO723273 Fresh & Fun Collection - Petal Pleasures Embossing Folder
CO721996 Clear Gemstones
CO721985 Double-Sided Tape - 1/4"
CO72`963 Foam Mounting Tape
CO721965 Sharp Point Scissors
CO721957 Cutting Mat
CO721986 Handheld Essentials
CO723060 Sanding Block

Other Supplies:
Bo Bunny Pattern Paper/Stickers
Blue Core'dinations Cardstock
Brown Satin Ribbon

Friday, September 13, 2013

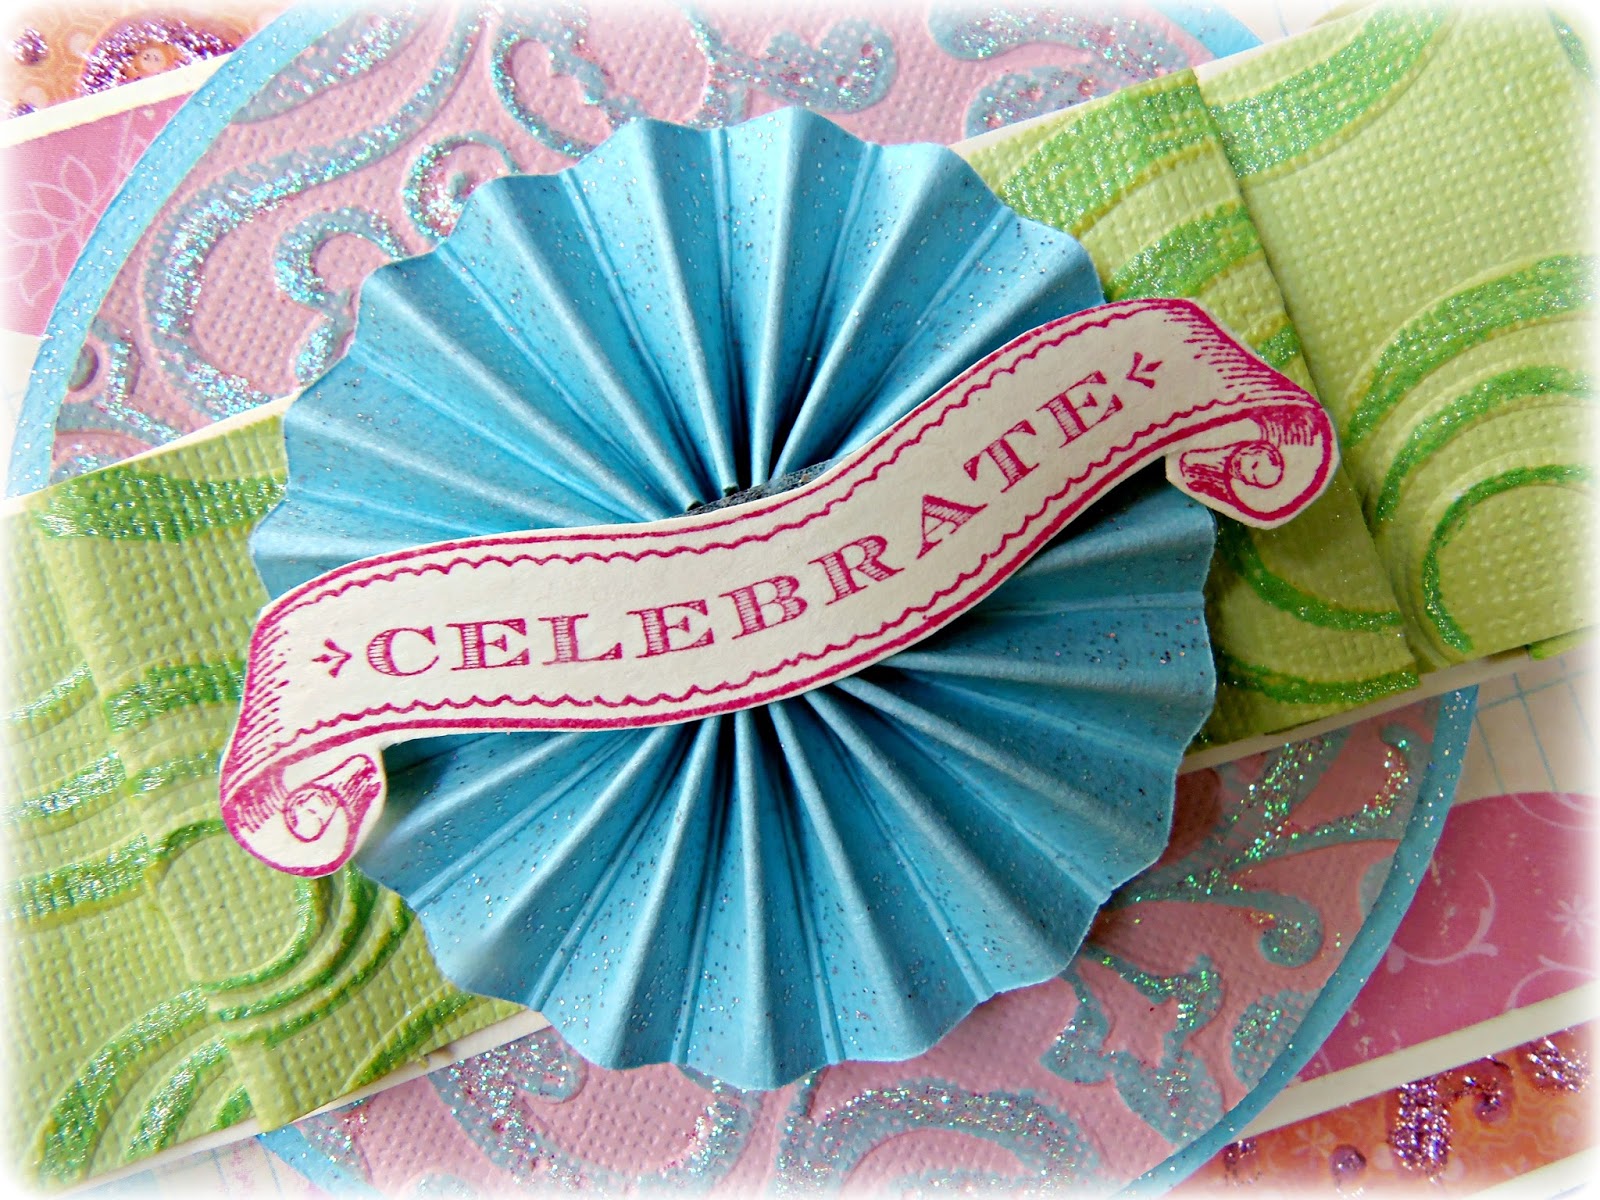
Layered Medallion Celebration Card with Patti

Hi! Patti here today sharing a celebration card that features a layered medallion. I wanted to create a dimensional card with some of the folders, and I wanted a blinged up look, so I used several Couture Creations embossing folders and then highlighted the raised areas with Glitzin' Glamour Glitter Glue! I used lots of Foam Mounting Tape too!
Here's my card!

I used some Core'dinations Glitter Cardstock and made a little medallion and placed a stamped title on it. I placed it on a ribbon pleated strip of Core'dinations Pastel Cardstock that I inked green. I placed a circle underneath the pleated cardstock that I embossed with the Couture Creations Exotic Embossing Folder and highlighted with Crystalina Glitzin' Glamour.


Here you see some close-up detail!


Here you can see the folded cardstock under the medallion.


The background of the card is a piece of cardstock that I also embossed with the Exotic Embossing Folder and highlighted with more Glitzin' Glamour in Lilac! This was lots of fun to do and it looks really festive too!

Thanks for stopping by today!
~Patti

Couture Creations Supplies:
CO723256 Fine Designs Collection - Exotic Embossing Folder
CO723276 Fresh and Fun Collection - Nuevo Embossing Folder
CO721975 Glitzin' Glamour - Lilac
CO721971 Glitzin' Glamour Cyrstalina
CO721965 Foam Mounting Tape

Wednesday, September 11, 2013

Happy Birthday Layout with Pam


Hi! Pam here today sharing a Happy Birthday layout I made using some fabulous dies and embossing folder from Couture Creations.  I love the embossing folders! They emboss so beautifully, the deep etched design of each folder yields a fantastic impression.


The "Happy Birthday" strip was part of a patterned paper I selected for this page. I wanted to use the Couture Creations Fudge Embossing Folder with it, so I first ran the strip through my embossing machine and then flipped it over and ran it through my embossing machine on the other side.


Once I had my strip embossed, I used my Couture Creations Sponge Dauber and a bit of ink to go over the top of it. I thought it helped to pop the embossed image.

After I had my distressing done on the Happy Birthday Strip, I added it to the top of my layout using Couture Creations Double-Sided Tape and placed some embellishments onto the page with Couture Creations Foam Mounting Tape.

I used the same technique on my rectangular pattern papers prior to placing them on my page.


Using the Couture Creations Sunflower Nesting Dies and Circle Nesting Dies, I made a layered piece to place under my photo.  


 It is an easy way to make your photo pop!


Hugs, Pammejo
Couture Creations Supplies:
CO723047 Nesting Dies - Scallop Rectangles
CO723040 Nesting Dies - Circles
CO723212 Nesting Dies - Sunflowers
CO723275 Fresh and Fun Collection - Fudge Embossing Folder
CO723525 Endless Dreams Decorative Dies - Hanging Sign
CO721994 Pink Diva Self Adhesive Gemstones
CO721956 Sharp Point Scissors
CO721961 Foam Mounting Tape
CO721986 Handheld Essentials
CO721957 Cutting Mat
CO723061 Sponge Daubers

Friday, August 23, 2013

Country Time + Handmade Daisies with Patti

Hello, its Patti here today with another variation of a bloom made with the Couture Creations Daisy Nesting Dies. There are so many different ways to customize handmade blooms. I really enjoy playing around with them and this one turned out pretty cute!

First, here is the finished page. These flowers were all picked within a mile of my house while walking on a dirt road and I put them in a mason jar glass. Just one of the perks of living in the country!


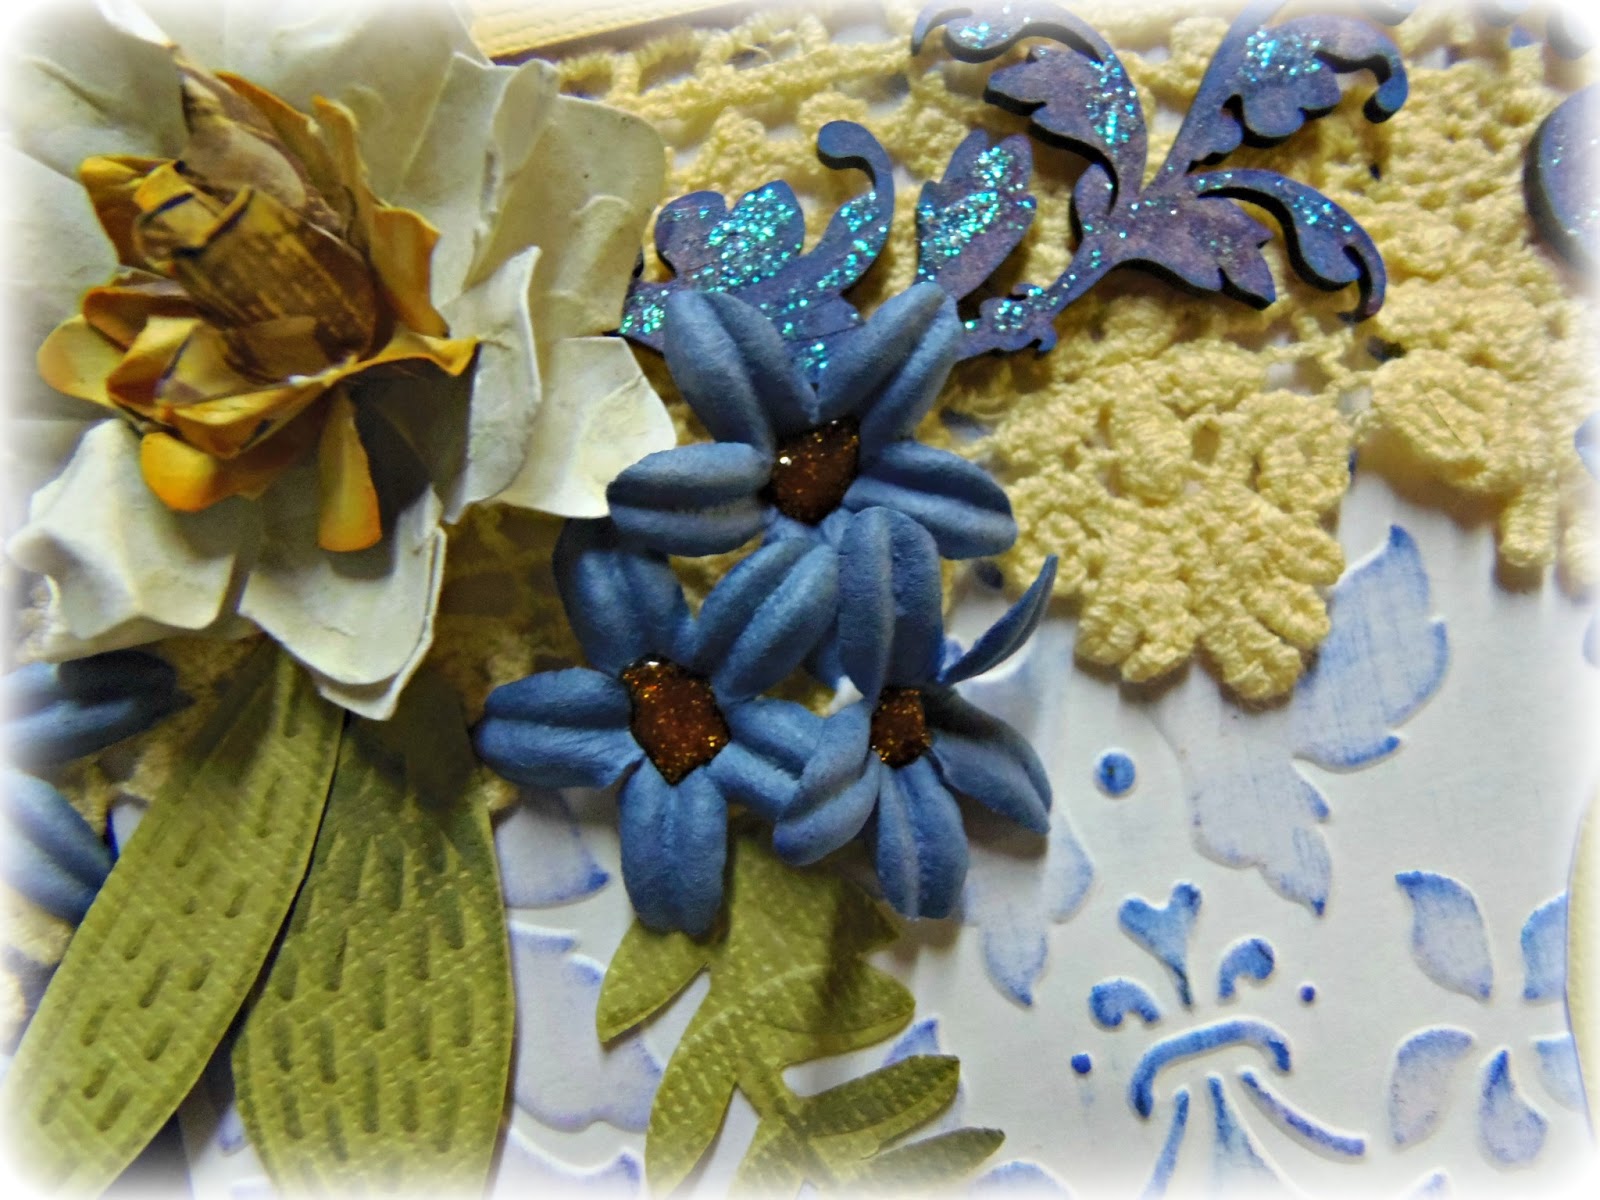
The first thing that I did was to use the Large Damask Flourish Embossing Folder from the Elegance Collection and emboss 2 pieces of white cardstock. I cut the cardstock into one long strip and just embossed each end. I then used two colors of ink, one purple and one blue, to get the desired color to match the background.


I altered a chipboard flourish from Imaginarium Designs using the same two colors of ink and then topped it with a coat of Glitzin' Glamour in Crystalina. Such a pretty look!


For the blooms I used the Daisy Nesting Dies in the two smallest sizes. I used the largest of the two for the white outer blooms and the smaller for the yellow centers. I inked the edges after cutting them out.

Using the Sharp Point Scissors, I snipped between each petal, making sure not to cut all the way to the flower center.


Next, I spritzed the flowers with water and curled them up as shown.


Once the petals were dry, I carefully pulled apart the petals with the Piercing Tool, taking care to not tear the tiny petals.


Once unfolded, I layered the petals and put them together!


This is what the bloom looks like after four layers of petals. You can play around and curl, fluff or do whatever you want with the blooms!


Here are the daisies on the page, along with the little blue blooms that I used a tiny dot of the Gold Glitzin' Glamour for the centers! You can also see some embossed fussy cut leaves that I created  with the Hyper Magical Embossing Folder from the Fresh & Fun Collection.


Here you see part of the chippie with the Glitzin' Glamour and some of the tiny blooms.


A few more close-ups.


I hope you enjoyed this post and I really appreciate you stopping by!

Couture Creations Supplies:
CO723217 Daisy Nesting Dies
CO723449 Elegance Collection - Large Damask Flourish Embossing Folder
CO723442 Fresh & Fun Collection - Hyper Magical Embossing Folder
CO721971 Glitzin' Glamour Glitter Glue - Crystalina
CO721976 Glitzin' Glamour Glitter Glue - Gold
CO721961 Foam Mounting Tape