Showing posts with label All Occasions. Show all posts
Wednesday, March 5, 2014
Thinking of You Card by Dana Tatar
Hi! Dana Tatar here today sharing a clean and simple card featuring one of my favorite Couture Creations embossing folders, the Super Plush Embossing Folder from the All Occasions Collection. I dressed up the simply embossed white cardstock with a boldly painted piece of chipboard for a fun pop of color.
I started this card by applying a liberal amount of dimensional paint to a piece of floral chipboard.
While the paint was still wet, I lightly misted the painted chipboard with brown mist.
Before the paint and mist dried, I sprinkled glitter onto the chipboard and set the piece aside to dry.
I embossed a piece of white cardstock with the Super Plush Embossing Folder and mounted it onto a piece of colored cardstock embossed side down. I then adhered the dry chipboard to the card and accented select areas of the flourish design with dimensional paint.
I just love the texture and shimmer of this chipboard piece! I stamped a sentiment onto the front of the card to finish.
Thanks so much for stopping by today!
Couture Creations Supplies:
CO723454 All Occasions Collection - Super Plush Embossing Folder
Other Supplies: Cardstock: Core'dinations; Chipboard: Blue Fern Studios; Stamp: 100 Proof Press; Paint: Art Anthology; Glitter: Martha Steward, Maya Road; Ink: Ranger; Mist: Art Anthology
Wednesday, February 19, 2014
Easy Framed Card by Bridget Louw
Hi! Couture Creations Designer Bridget Louw here today with a super quick and easy card.
The card measures 7” high x 5” wide.
The white base layer measures 10” x 7” scored at 5”
The darker pink measures 4 7/8” x 6 7/8”
The lighter pink measures 4 ¾” x 6 ¾”
Using the third largest Square Nesting Die, cut a square from dark pink cardstock. Line up the light pink cardstock over the square cutout and die-cut a larger square using the second largest Square Nesting Die.
You should now have a square window cut out with some of the darker pink showing through like a frame.
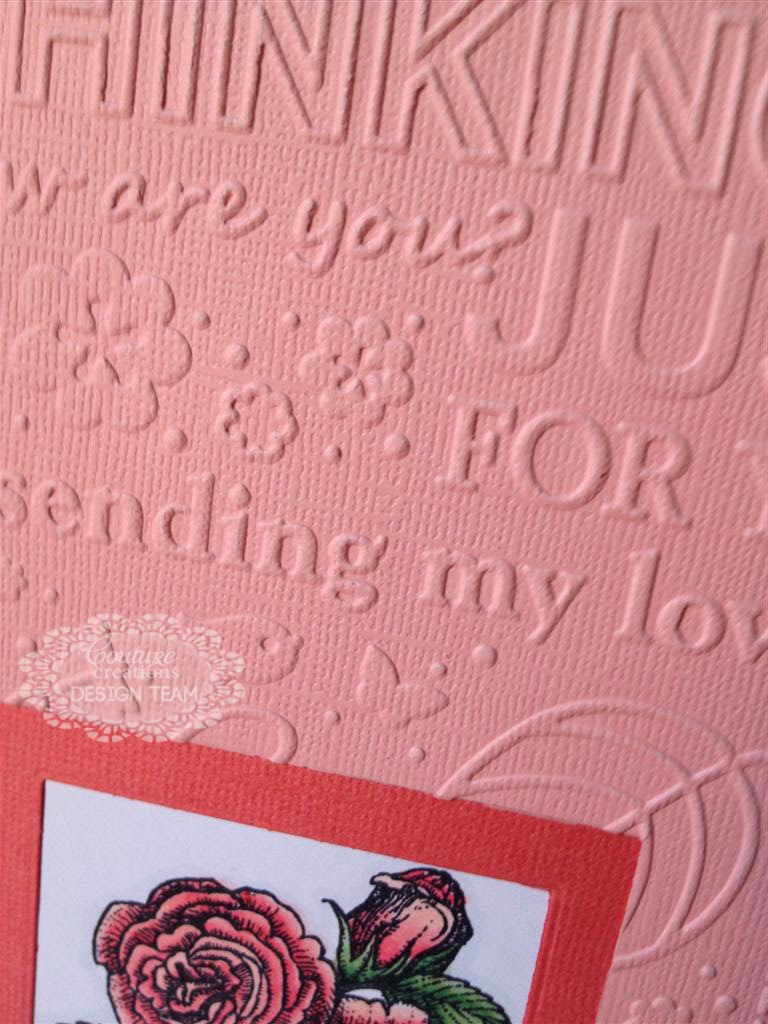
Using the Thinking of You Embossing Folder, emboss the light pink layer. Cut some marker blending cardstock with the largest Square Nesting Die. Stamp the image you have chosen on the shape and color as desired.
The next step is to adhere the colored image behind the square gap in the dark pink layer. On top of that, stick down the embossed light pink layer.
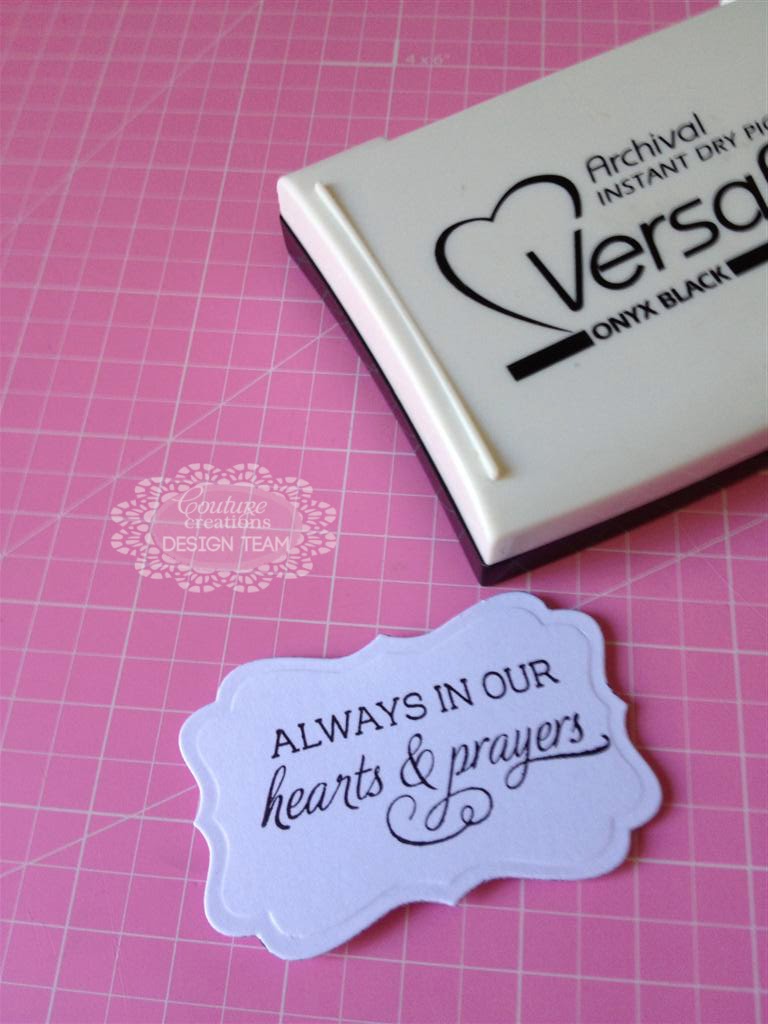
I stamped a sweet sentiment onto a piece of cardstock I had cut using a Victorian Rectangle Nesting Die and glued the sentiment on the inside of the card using Foam MountingTape.
Super quick, super easy! I hope you like my card and will
try making it with the amazing product range from Couture Creations.
Couture Creations Supplies:
C0723042 Square Nesting Dies
C0723049 Victorian Rectangles Nesting Dies
CO723296 All Occasions Collection - Thinking of You Embossing Folder
C0721963 Foam Mounting Tape
C0721984 Double Sided Tape
C0721957 Cutting Mat
C0721986 Handheld Essentials
CO723039 Precision Trimmer
Friday, January 24, 2014
Faux Tie Dye Card by Bridget Louw
Hi! Couture Creations Designer Bridget Louw here today sharing a fun card that showcases a faux tie dye technique using Distress Paint. Once the paper has dried you can emboss it or cut it using the amazing array of folders and dies from Couture Creations.
Step 1: Cut a card base from white cardstock to measure 10 inches by 7 inches. Scored at 5 inches.
Cut a piece of colored cardstock to measure 6 7/8 inches by 4 7/8 inches and mount onto the white cardstock base with Double-Sided Tape.
Step Two: Cut another piece of white cardstock to measure 4 3/4 inches by 6 3/4 inches. This is the piece of cardstock that we will faux tie dye.
Step Three: On a non-stick craft mat, spread the Distress Paint in the colors of your choice and mist lightly with water. Sweep your cardstock through the paint until it is completely covered and set aside to dry.
Step Four: While the painted cardstock is drying, use the second smallest die from the Victorian Rectangles Nesting Dies to cut a piece of white cardstock and stamp your card sentiment on it. Create a bow with one or multiple loops and set aside.
Step Six: Create faux stitching with the piercer from the Handheld Essentials Set. Fill in each hole with a white pen to simulate stitches.
Step Seven: Adhere the tie dye cardstock to the front of the card. Attach the sentiment and ribbon using Foam Mounting Tape.
Thanks for stopping by today!
~Bridget
C0723452 All Occasions Collection - Persuasion Blooms Embossing Folder
C0723049 Victorian Rectangles Nesting Dies
C0721963 Foam Mounting Tape
C0721984 Double-Sided Tape
C0721957 Self Healing Cutting Mat
C0721986 Handheld Essential
CO723039 Precision Trimmer
Friday, January 10, 2014
All Occassions Feature Week - You Sparkle You Shine Card with Pam Bray
Hi! Pam here with my first post for the New Year and what better way to celebrate than to share a card I created using the All Occasions Super Plush Embossing Folder!? I used a piece of Light Blue/Kraft Core'dination Distress Cardstock with the embossing folder and then lightly distressed it with my Couture Creations Sanding Block. I adhered the embossed piece to the front of a kraft card base and added some pretty pattern paper and a punched border that I embellished with Seaspray Self Adhesive Gemstones. I die-cut a Scallop Circle and a Circle from the Couture Creations Nesting Die Sets to place behind my die-cut sentiment.
Here is a closer look at the beautiful Super Plush Embossing Folder. Don't you love it? I know I do! I hope you have a wonderful, sparkly and sunshiny New Year!
Hugs, Pammejo
Couture Creations Supplies:
CO723454 All Occasions Collection - Super Plush Embossing Folder
CO 723041 Scallop Circle Nesting Dies
CO723040 Circle Nesting Dies
CO721989 Seaspray Self-Adhesive Gemstones
CO721984 Double-Sided Tape
CO721955 Sharp Point Scissors
CO721957 Cutting Mat
Thursday, January 9, 2014
All Occasions Feature Week - Spring Roses Card by Tracey Cooley
Hi Creators! Tracey Cooley here today. My daughter set me a challenge recently to make a spring card so I immediately thought of the Couture Creations Joe's Garden Embossing Folder from the All Occasions Collection.
I simply embossed a piece of Core'dinations White Wash Cardstock with the Joe's Garden Embossing Folder and sanded the roses with the Couture Creations Sanding Block.
Then I colored the leaves with some acrylic paint and a fine paintbrush. I did this very roughly to create a shabby effect. I simply embellished the card with some flowers to finish.
Keep on Creating!
Couture Creations Supplies:
CO723298 All Ocassions Collection - Joe's Garden Embossing Folder
CO723060 Sanding Block
CO721984 Double-Sided Tape
Wednesday, January 8, 2014
All Occasions Feature Week - Winter Wishes with Dana Tatar
Hi! Dana here today sharing a card I created for the All Occasions Embossing Folder Feature this week. I used the gorgeous Moments Embossing Folder.
The folder has a beautiful floral design that is perfect for Spring. I simply adapted it for the Winter season by covering the flowers with snowflakes that I topped with Moonlight Self-Adhesive Pearls and adding some frosty flourishes with Crystalina Glitzin' Glamour Glitter Glue.
Thanks for stopping by today!
Couture Creations Supplies:
CO723300 All Occasions Collection - Moments Embossing Folder
CO721998 Moonlight Self-Adhesive Pearls
CO721971 Crystalina Glitzin' Glamour Glitter Glue
CO723039 Precision Trimmer
Tuesday, January 7, 2014
All Occasions Feature Week - Happy Birthday Card with Patti Hamil
Hi! Patti here today. I'd like to share a card I created using the Happy Birthday Embossing Folder from the Couture Creations All Occasions Collection. I created a layered look with three different colors of embossed cardstock, separating each layer with Foam Mounting Tape for dimension.
I inked each piece of embossed cardstock with a shade of ink darker than the color. I finished the card with a fun bow. It's a simple card, but gives the handmade look to show that you care! Please check out all of the folders in this collection!
Thanks so much for stopping in!
~Patti
Couture Creations Supplies:
CO723295 All Occasions Collection - Happy Birthday Embossing Folder
CO721961 Foam Mounting Tape
I inked each piece of embossed cardstock with a shade of ink darker than the color. I finished the card with a fun bow. It's a simple card, but gives the handmade look to show that you care! Please check out all of the folders in this collection!
Thanks so much for stopping in!
~Patti
Couture Creations Supplies:
CO723295 All Occasions Collection - Happy Birthday Embossing Folder
CO721961 Foam Mounting Tape
Monday, January 6, 2014
One In A Million by Tracey Cooley
Hi! Couture Creations designer Tracey Cooley here today sharing a layout for the All Occasions feature this week. My gorgeous daughter Tayla is definitely one in a million! She is loving, responsible, thoughtful and a hard worker. Not to mention beautiful (but I could be bias). I love this picture of her my brother took while holidaying in Kenya and hoped to do it justice with a layout that captures her spirit.
I have been looking for a realistic looking rose leaf for some time now and Couture Creations has the perfect leaf to go with roses. You can see on this layout the detail in the leaves and how real they look. All this thanks to the Couture Creations All Occasions Jazmyne Embossing Folder. This has quickly become my favorite embossing folder!
I simply embossed a piece of Jet Black Core'dinations cardstock with the Jazmyne Embossing Folder and cut out those gorgeous leaves, molded them with my fingers and tucked them under my flowers.
Butterflies a pretty popular on patterned paper and I love to cut their little wings out, fold them up and place an alternate patterned paper underneath. On this layout I have added a bit of Crystalina Glitzin' Glamour Glitter Glue to the patterned paper underneath the butterfly wings. I also added it to the white Dazzling Doily die-cuts under the photograph. I hope you like this layout as much as I do.
Thanks for stopping by and keep on creating!
CO723225 Fantasia Collection - Dazzling Doily Die
CO723222 Fantasia Collection - Ivy Doily Die
CO723293 All Occasions Collection - Jazmyne Embossing Folder
CO721971 Crystalina Glitzin' Glamour Glitter Glue
CO721957 Cutting Mat
CO721987 Craft Knife
CO721956 Sharp Point Scissors
Monday, November 25, 2013
Gratitude Card with Dana Tatar
Hi! Dana here today sharing a card that I created with the gorgeous Couture Creations Endless Embossing Folder today. I have many things to be thankful for and this card will be going to someone special! I embossed a piece of metal for the background of my card and then added color with alcohol inks for a fun and festive finish.
Follow these steps to create a similar card:
Step One: Emboss a piece of aluminum with the Endless Embossing Folder.
Step Two: Color the embossed metal with alcohol inks. I used Tim Holtz Butterscotch, Red Pepper and Terra Cotta Alcohol Inks along with some Gold Mixatives for a bit of shine.
Step Three: Wrap a piece of ribbon around the center of the embossed and colored aluminum piece and mount onto a cardstock card base using Foam Mounting Tape.
Step Four: Cut a piece of white cardstock with a Scalloped Oval Nesting Die. Ink the edges. Stick the oval over the center of the ribbon with Double-Sided Tape.
Step Five: Attach a chipboard sentiment to the center of the Scalloped Oval die-cut with Foam Mounting Tape.
Thanks so much for stopping by today!
CO723294 All Occasions Collection - Endless Embossing Folder
CO723045 Premium Nesting Dies - Scalloped Oval
CO721961 Foam Mounting Tape
CO721965 Double-Sided Tape
Other Supplies: Cardstock: Core'dinations; Cardstock Sentiment: Teresa Collins; Ribbon: May Arts; Alcohol Ink: Ranger; Gold Mixatives: Ranger; Distress Ink: Ranger; Alcohol Ink Blending Solution: Ranger
Wednesday, November 6, 2013
Sophia Die Week - Joy Card with Dana
Hi! Dana here today sharing a Christmas card that I created using a gorgeous die and embossing folder offered by Couture Creations. I used the Super Plush Embossing Folder, from the All Occasions Collection, on the white cardstock base of my card. I painted over the embossed pattern with some gold mist to add a subtle shimmer to the background of my card.
I had some fun with the Pucci Die from the Sophia Intricutz Die Collection. After cutting a piece of black cardstock with the Pucci Die, I flipped over the die-cut to make a decorative letter "J" for the sentiment on my card.
Thanks for stopping by today!
~Dana
Couture Creations Supplies:
CO723454 All Occasions Collection - Super Plush Embossing Folder
CO723503 Sophia Intricutz Collection - Pucci Die
Wednesday, September 25, 2013
Get Rusty with Gloria
Hello everyone! Gloria here today sharing a fall-themed card.
I created a faux patina effect for this card. It is a fun way to get more use out of your folders! I used the Endless Embossing Folder from the All Occasions Collection.
Use a brayer to add ink to the embossing folder. I used a selection of fall colors of dye ink. Make sure you add ink to the inside of the folder, on the section containing the black Couture Creations logo. Place cream cardstock into the folder and emboss. Wash your folder to prevent staining. Use a heat tool to make sure the ink on the cardstock is totally dry.
Create a "patina" by using a foam or sponge ink applicator to ink over the raised areas of the embossed paper with green, blue, and dark brown ink, in that order. Allow to dry. You may use a heat tool to dry the ink if you wish.
Ink some of the raised areas with watermark or clear embossing ink. You only want to heat emboss a few areas to create a "rusted" look on your card. Emboss with metallic embossing powder. I created my own "rust" powder by combining several powders together. Trim the paper to size and use it to create a card.
I cut out the sentiment with the Rectangle Nesting Dies and Scallop Rectangle Nesting Dies and attached it to the card with Foam Mounting Tape.
Couture Creations Supplies:
CO723046 Rectangle Nesting Dies
CO723047 Scallop Rectangle Nesting Dies
CO723294 All Occasions Collection - Endless Embossing Folder
CO721956 Sharp Point Scissors
CO721986 Handheld Essentials - Embossing Tool
CO721965 Double-Sided Tape
CO721963 Foam Mounting Tape
CO721957 Cutting Mat
I created a faux patina effect for this card. It is a fun way to get more use out of your folders! I used the Endless Embossing Folder from the All Occasions Collection.
Use a brayer to add ink to the embossing folder. I used a selection of fall colors of dye ink. Make sure you add ink to the inside of the folder, on the section containing the black Couture Creations logo. Place cream cardstock into the folder and emboss. Wash your folder to prevent staining. Use a heat tool to make sure the ink on the cardstock is totally dry.
Create a "patina" by using a foam or sponge ink applicator to ink over the raised areas of the embossed paper with green, blue, and dark brown ink, in that order. Allow to dry. You may use a heat tool to dry the ink if you wish.
Ink some of the raised areas with watermark or clear embossing ink. You only want to heat emboss a few areas to create a "rusted" look on your card. Emboss with metallic embossing powder. I created my own "rust" powder by combining several powders together. Trim the paper to size and use it to create a card.
Thanks for joining me today!
Couture Creations Supplies:
CO723046 Rectangle Nesting Dies
CO723047 Scallop Rectangle Nesting Dies
CO723294 All Occasions Collection - Endless Embossing Folder
CO721956 Sharp Point Scissors
CO721986 Handheld Essentials - Embossing Tool
CO721965 Double-Sided Tape
CO721963 Foam Mounting Tape
CO721957 Cutting Mat
Wednesday, August 28, 2013
Happy Fall Y'All Card with Gloria
Hello, it's Gloria from Scraps of Life.
I used the Endless Embossing Folder from the Couture Creations All Occasions Collection for my card today. I know it is only August, but I love fall, so I am getting a jump start!
I used the "debossed" side of the kraft cardstock for this card. First, I rubbed the folder with ink, on the side of the folder WITHOUT the Couture Creations logo. Then, I embossed the kraft cardstock. I think the leaves look like "fossils."
I used the Couture Creations Nested Victorian Rectangle Die to cut out my sentiment. I stamped the sentiment using several ink colors. I just tapped the stamp into different colors if ink and stamped. Easy! I used the same technique for the fall leaves that I fussy cut.
Couture Creations Supplies:
CO723294 All Occasions - Endless Embossing Folder
CO723049 Nesting Dies - Victorian Rectangles
CO721963 Foam Mounting Tape
CO721965 Double-Sided Tape
CO721965 Sharp Point Scissors
CO721957 Cutting Mat
CO721986 Handheld Essentials - Scoring Tool
Other Supplies: Cardstock: WorldWin Papers Kraft, Light Totally Tan, Deep Terra-Cotta; Ink: Tsukineko Kaleidacolor Autumn Leaves, Cappuccino Delight, Clearsnap Colorbox Chalk Creamy Brown; Ribbon: Really Reasonable Ribbon; Stamps: Close to My Heart (leaves), Taylored Expressions (sentiment)
I used the "debossed" side of the kraft cardstock for this card. First, I rubbed the folder with ink, on the side of the folder WITHOUT the Couture Creations logo. Then, I embossed the kraft cardstock. I think the leaves look like "fossils."
I used the Couture Creations Nested Victorian Rectangle Die to cut out my sentiment. I stamped the sentiment using several ink colors. I just tapped the stamp into different colors if ink and stamped. Easy! I used the same technique for the fall leaves that I fussy cut.
CO723049 Nesting Dies - Victorian Rectangles
CO721963 Foam Mounting Tape
CO721965 Double-Sided Tape
CO721965 Sharp Point Scissors
CO721957 Cutting Mat
CO721986 Handheld Essentials - Scoring Tool
Other Supplies: Cardstock: WorldWin Papers Kraft, Light Totally Tan, Deep Terra-Cotta; Ink: Tsukineko Kaleidacolor Autumn Leaves, Cappuccino Delight, Clearsnap Colorbox Chalk Creamy Brown; Ribbon: Really Reasonable Ribbon; Stamps: Close to My Heart (leaves), Taylored Expressions (sentiment)
Friday, August 23, 2013
Country Time + Handmade Daisies with Patti
Hello, its Patti here today with another variation of a bloom made with the Couture Creations Daisy Nesting Dies. There are so many different ways to customize handmade
blooms. I really enjoy playing around with them and this one turned out
pretty cute!
First, here is the finished page. These flowers were all picked within a mile of my house while walking on a dirt road and I put them in a mason jar glass. Just one of the perks of living in the country!
I altered a chipboard flourish from Imaginarium Designs using the same two colors of ink and then topped it with a coat of Glitzin' Glamour in Crystalina. Such a pretty look!
Using the Sharp Point Scissors, I snipped between each petal, making sure not to cut all the way to the flower center.
Next, I spritzed the flowers with water and curled them up as shown.
Once the petals were dry, I carefully pulled apart the petals with the Piercing Tool, taking care to not tear the tiny petals.
Once unfolded, I layered the petals and put them together!
This is what the bloom looks like after four layers of petals. You can play around and curl, fluff or do whatever you want with the blooms!
Here you see part of the chippie with the Glitzin' Glamour and some of the tiny blooms.
First, here is the finished page. These flowers were all picked within a mile of my house while walking on a dirt road and I put them in a mason jar glass. Just one of the perks of living in the country!
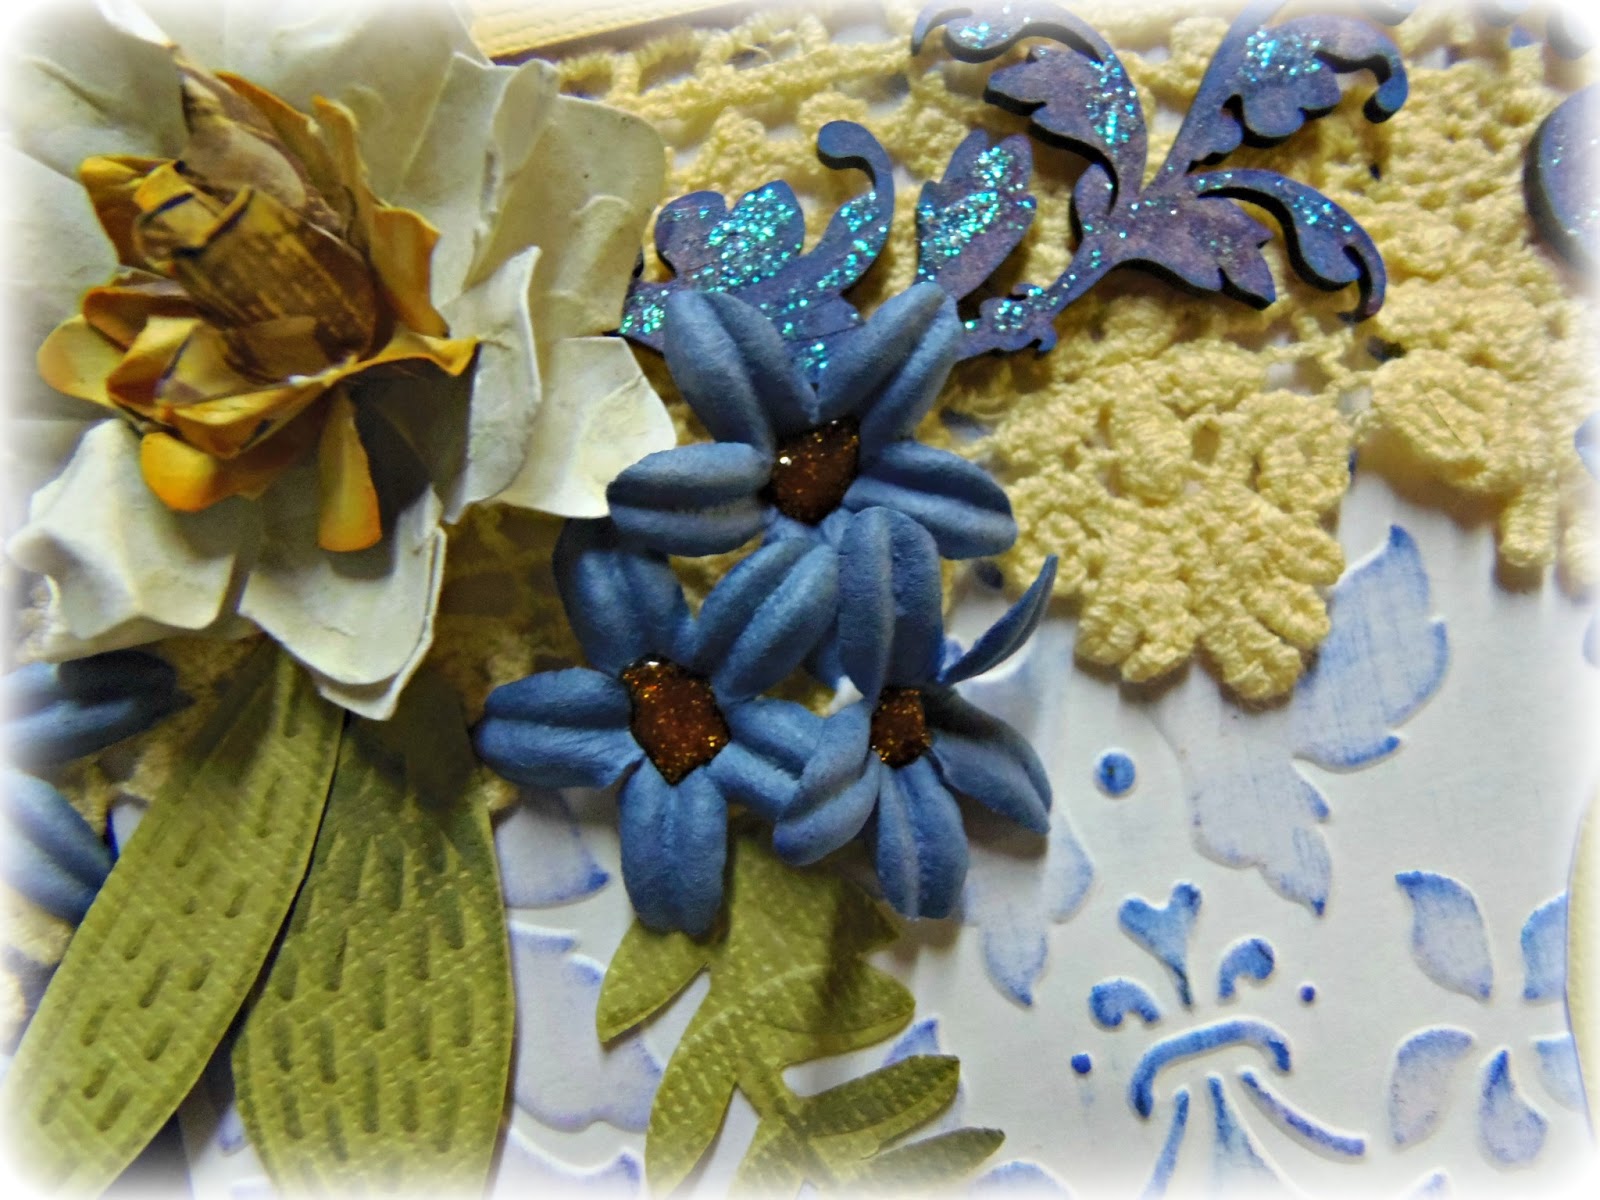
The first thing that I did was to use the Large Damask Flourish Embossing Folder from the Elegance Collection and emboss 2 pieces of
white cardstock. I cut the cardstock into one long strip and just embossed each
end. I then used two colors of ink, one purple and one blue, to get the
desired color to match the background.
I altered a chipboard flourish from Imaginarium Designs using the same two colors of ink and then topped it with a coat of Glitzin' Glamour in Crystalina. Such a pretty look!
For the blooms I used the Daisy Nesting Dies in the two smallest
sizes. I used the largest of the two for the white outer blooms and the
smaller for the yellow centers. I inked the edges after
cutting them out.
Using the Sharp Point Scissors, I snipped between each petal, making sure not to cut all the way to the flower center.
Next, I spritzed the flowers with water and curled them up as shown.
Once the petals were dry, I carefully pulled apart the petals with the Piercing Tool, taking care to not tear the tiny petals.
Once unfolded, I layered the petals and put them together!
This is what the bloom looks like after four layers of petals. You can play around and curl, fluff or do whatever you want with the blooms!
Here are the daisies on the page, along with the little blue blooms that I
used a tiny dot of the Gold Glitzin' Glamour for the centers! You can
also see some embossed fussy cut leaves that I created with the Hyper Magical Embossing Folder from the Fresh & Fun Collection.
Here you see part of the chippie with the Glitzin' Glamour and some of the tiny blooms.
A few more close-ups.
I hope you enjoyed this post and I really appreciate you stopping by!
Couture Creations Supplies:
CO723217 Daisy Nesting Dies
CO723449 Elegance Collection - Large Damask Flourish Embossing Folder
CO723442 Fresh & Fun Collection - Hyper Magical Embossing Folder
CO721971 Glitzin' Glamour Glitter Glue - Crystalina
CO721976 Glitzin' Glamour Glitter Glue - Gold
CO721961 Foam Mounting Tape
Subscribe to:
Posts (Atom)