Showing posts with label Foam Mounting Tape. Show all posts

Friday, March 28, 2014

Peacock Delight Projects by Adriana Bolzon


Hi! Couture Creations Designer Adriana Bolzon here today sharing how I create my two projects that are featured on the cover of the latest issue of the Couture Creations Creative Inspiration Magazine.

Peacock Pride Instructions

Roughly hand-draw the head and body of a peacock on Dark Blue cardstock. Cut out the figure.

Ink the edges and shadow highlights of the neck and the eye of peacock with a black inkpad and a Sponge Dauber. Highlight the features of the eye and face of the peacock with a fine white pen.

Cut small strips of Orange cardstock and use them to create a crown on the head of peacock. Cut a small beak from Orange cardstock and glue to the end of the peacock face. Place Crystal and Green Envy Self-Adhesive Gemstones to the head of peacock as shown in photograph. Highlight areas with a white pen as shown. Add a Moonlight Self-Adhesive Pearl to the center of the peacock eye.


Punch an assortment of small oval shaped pieces (you can use a small oval nesting die) and leaves from Lime Green and Ocean Blue cardstock. Ink the edges of the oval shapes and leaves with black ink and a Sponge Dauber.

Secure the oval shapes and leaves to the upper part of the body of the peacock with 3D Foam Dots,
layering shapes on top of each other. Place Crystal Self-Adhesive Gemstones on top of the punched shapes.

Peacock Feather Instructions


Cut 25 feathers from both Lime Green and Ocean Blue cardstock using the Peacock Delight Decorative Die.


Place one peacock feather die-cut on top of another peacock feather die-cut, slightly off center, and adhere with glue. Alternate the color of feather on the top.


Use a Sponge Dauber to apply black ink to the edges of each feather. Apply Crystalina and Green Glitzin' Glamour Glitter Glue down the center of each double-layered peacock feather. Let dry. Repeat the above process for each peacock feather. You will require around 25 doubled layered feathers to complete this project.


To create the background of the project, place a stencil on top of black cardstock and gently apply white ink over the stencil using a Sponge Dauber.

Place and adhere the body of the peacock on the black cardstock with 3D Foam Dots. Adhere 3D Foam Dots or Foam Mounting Tape underneath each feather. Arrange clusters of feathers as shown.
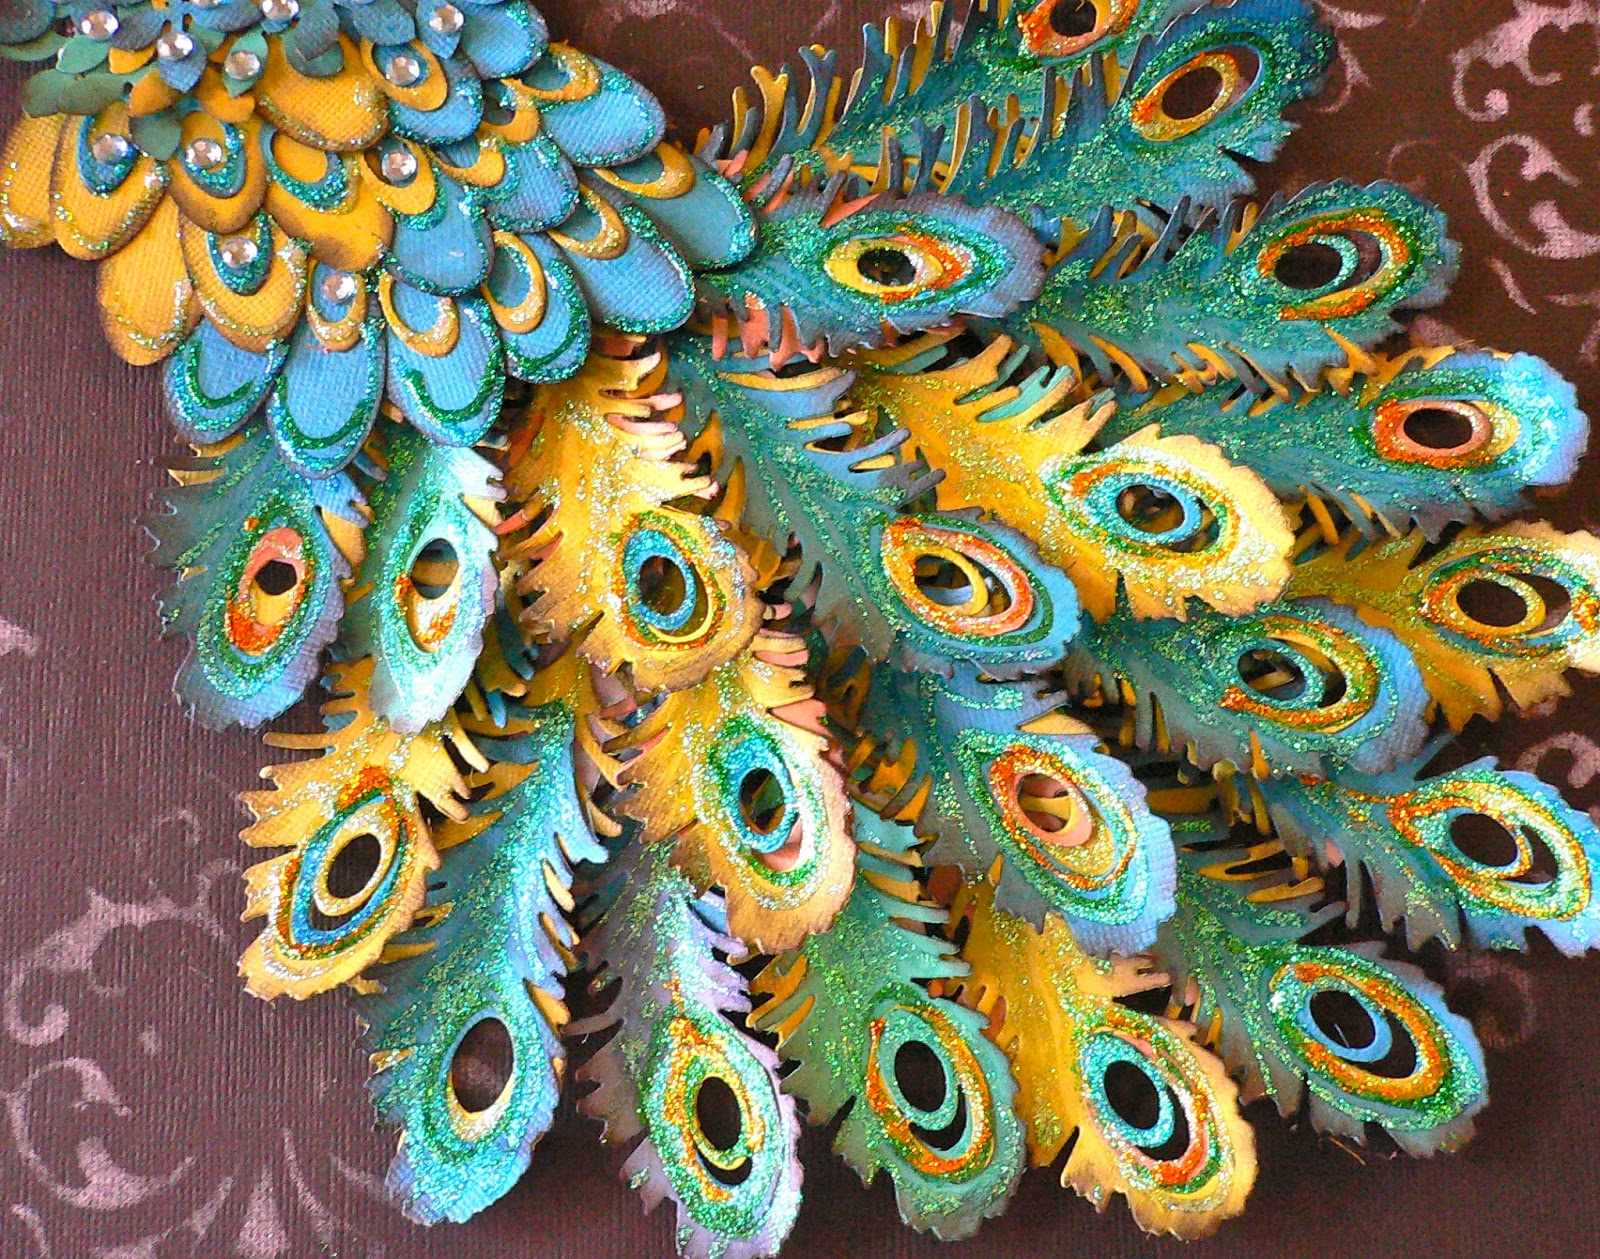


Highlight the edges of the feathers with Green, Gold and Crystalina Glitzin' Glamour Glitter Glue. Let dry.

Couture Creations Supplies - Peacock Pride
CO723707 Glamour Days Collection - Peacock Delight Decorative Die
CO721996 Crystal Self-Adhesive Gemstones
CO721991 Green Envy Self-Adhesive Gemstones
CO721978 Green Glitzin' Glamour Glitter Glue 
CO721971 Crystalina Glitzin' Glamour Glitter Glue
CO721976 Gold Glitzin' Glamour Glitter Glue
CO723780 Foam Mounting Tape
CO723623 Sponge Daubers

Other Supplies: Cardstock, Stencil; Leaf Punch; Oval Punch; Ink; White Pen


Peacock Mask


Peacock Mask Instructions

Use Mod Podge to adhere torn pieces of vintage music paper to a plastic mask. Let dry.

Adhere lace trim and Seaspray and Vintage Gold Self-Adhesive Gemstones to the top section of mask as shown below.


Create 10 doubled layered peacock feathers using the same technique shown in the step-by-step above for the Peacock Pride project.

Arrange a cluster of bird feathers and paper peacock feathers and adhere to each end of mask with Double Sided Tape and 3D Foam Dots.


Create bows with sheer ribbon and layered blue silk flowers with a pearl brad center. Adhere these clusters to each side of the mask.

Create a background with a stencil and a white inkpad, attach the mask to background.


Couture Creations Supplies - Peacock Mask
C0723707 Glamour Days Collection - Peacock Delight Decorative Die
C0721996 Crystal Self-Adhesive Gemstones
C0721990 Vintage Gold Self-Adhesive Gemstones
C0723780 3D Foam Dots
C0721963 Foam Mounting Tape
C0721983 Doubled Sided Tape
C0723623 Sponge Daubers

Thanks for looking!
Cheers, Adriana


Friday, February 21, 2014

Nautical Card with Vicki Robertson


Hi! Vicki here today sharing some wishful thinking with you! February can't be over soon enough for me. This has been a cold, snowy month in the Northeast and I am thinking of summer, sand and being at the beach. That said, here's a card I created using the Couture Creations Harmony and Secret Treasure Collections of embossing folders and dies.

The card base measures 5 x7 and cut is from kraft cardstock. This is topped with a mat cut from cork specialty paper. Next, I embossed the lighthouse image using the Lighthouse Embossing Folder on natural canvas. The nautical theme is all the rage and this embossing folder is no exception. I gently inked over the embossed image with distress ink to enhance the embossing. A Vintage Gold Gemstone at the top of the lighthouse represents the light.

The Ships Wheel and Anchor Dies from the Secret Treasures Collection are also cut from cork. I adhered the ships wheel directly to the canvas and added black pearls. I gave the anchor added dimension with Foam Mounting Tape and placed it against the ships wheel.

The quote is printed on natural canvas and inked along the edges. I punched a couple of holes and added some yellow twine ties to the pennant shaped tag. The bottom corner is tucked behind the ships wheel while the rest of it is adhered to make it look like it is moving.

I hope you enjoyed my nautical inspiration!

Vicki
He"artful" Validation of Vicki

Couture Creations Supplies:
CO723628 Harmony Collection - Lighthouse Embossing Folder
CO723521 Secret Treasures Collection - Anchor
CO723520 Secret Treasures Collection - Ships Wheel
CO721990 Vintage Gold Self-Adhesive Gemstones
CO723957 Cutting Mat
CO721962 Foam Mounting Double Tape
CO723039 Precision Paper Trimmer

Wednesday, February 5, 2014

Lacy 8 Valentine Card with Vicki Robertson


Hi! Vicki here today sharing a card that I created with a new dies from the Couture Creations Madeline Collection. With Valentine's Day a week away, it's time to roll out that special Valentine for the one you love! I created this card using the new beautiful Lacy 8 and the Hearts Nesting Dies.  This one is for my sweetheart. I'll save the sentiment for inside!


The card base of white cardstock is layered with both pink and white/gold foil heart patterned paper from the Teresa Collins You Are My Happy Collection. I used the Lacy 8 Die with the gold glitter paper and the Hearts Nesting Dies with the pink glitter paper. The Lacy 8 is a two part die consisting of an outer frame portion and an ornate inner circle. 


After adhering the frame to the card, I centered the large pink heart in the open circle area.  Next, I applied Foam Mounting Tape to the back of the ornate circle portion of the Lacy 8 die-cut and adhered it over the heart. I double layered two smaller die-cut hearts and placed them over the center opening of the ornate circle with more Foam Mounting Tape.

To further embellish the card, I added Moonlight Self Adhesive Pearls to the 4 corners of the frame, added a bow, flowers and a couple of stick pins. 

I hope you enjoyed my Valentine inspiration!

Couture Creation Supplies:
CO723241 Madeline Ornamental Lace Die Collection - Lacy 8
CO723213 Hearts Nesting Dies
CO721967 Cutting Mat
CO721962 Foam Mounting Tape (6mm)
CO721956 Pointed Stainless Steel Scissors
CO721998 Moonlight Self Adhesive Pearls

Other Supplies: Glitter Paper: American Crafts, Recollections; Patterned Paper: Teresa Collins; Roses: Recollections; Stick Pink: Close To My Heart; Bow Maker Tool: Craft-Dee BowZ; Other: Stick Pin, Satin Ribbon

Tuesday, February 4, 2014

Glamour Days Flamingo Card with Dana Tatar


Hi! Dana here today sharing a card highlighting one of the new dies from Couture Creations. I absolutely love this Flamingo Die from the Glamour Days Intricutz Die Collection! I'm so ready for Spring and had a lot of fun putting this tropical card together.


I added some texture with a burlap frame that I cut using the largest Cameo Nesting Die. I cut a smaller piece of cardstock with the largest Oval Nesting Die and lined the edge with a pearl pen.


I wanted to make my flamingo look as lifelike as possible, so I used the Flamingo Die to cut two flamingos from patterned paper, one pink and the other orange. I cut the orange legs and beak from one die-cut and layered them on top of the pink flamingo die-cut. I blurred the seams with pink and orange ink for a smooth finish. I added a Blue Iceberg Gemstone for the flamingo's eye.

Thanks for stopping by today! I hope you are finding a way to stay warm!
~Dana

Couture Creations Supplies:
CO723709 Glamour Days Collection - Flamingo Die
CO723219 Cameo Nesting Dies
CO723044 Oval Nesting Dies
CO721992 Blue Iceberg Self Adhesive Gemstones
CO721961 Foam Mounting Tape
CO723039 Precision Trimmer

Tuesday, January 7, 2014

All Occasions Feature Week - Happy Birthday Card with Patti Hamil

Hi! Patti here today. I'd like to share a card I created using the Happy Birthday Embossing Folder from the Couture Creations All Occasions Collection. I created a layered look with three different colors of embossed cardstock, separating each layer with Foam Mounting Tape for dimension.

I inked each piece of embossed cardstock with a shade of ink darker than the color. I finished the card with a fun bow. It's a simple card, but gives the handmade look to show that you care! Please check out all of the folders in this collection!

Thanks so much for stopping in!
 ~Patti

Couture Creations Supplies:
CO723295 All Occasions Collection - Happy Birthday Embossing Folder
CO721961 Foam Mounting Tape

Monday, November 25, 2013

Gratitude Card with Dana Tatar


Hi! Dana here today sharing a card that I created with the gorgeous Couture Creations Endless Embossing Folder today. I have many things to be thankful for and this card will be going to someone special! I embossed a piece of metal for the background of my card and then added color with alcohol inks for a fun and festive finish.

Follow these steps to create a similar card:

Step One: Emboss a piece of aluminum with the Endless Embossing Folder.

Step Two: Color the embossed metal with alcohol inks. I used Tim Holtz Butterscotch, Red Pepper and Terra Cotta Alcohol Inks along with some Gold Mixatives for a bit of shine.

Step Three: Wrap a piece of ribbon around the center of the embossed and colored aluminum piece and mount onto a cardstock card base using Foam Mounting Tape.

Step Four: Cut a piece of white cardstock with a Scalloped Oval Nesting Die. Ink the edges. Stick the oval over the center of the ribbon with Double-Sided Tape.

Step Five: Attach a chipboard sentiment to the center of the Scalloped Oval die-cut with Foam Mounting Tape.

Thanks so much for stopping by today!

Couture Creations Supplies:
CO723294 All Occasions Collection - Endless Embossing Folder
CO723045 Premium Nesting Dies - Scalloped Oval
CO721961 Foam Mounting Tape
CO721965 Double-Sided Tape

Other Supplies: Cardstock: Core'dinations; Cardstock Sentiment: Teresa Collins; Ribbon: May Arts; Alcohol Ink: Ranger; Gold Mixatives: Ranger; Distress Ink: Ranger; Alcohol Ink Blending Solution: Ranger

Wednesday, November 20, 2013

Autumn Card with Pam Bray


Hi! Pam here today sharing my Autumn Card created with the Exotic Embossing Folder from the Couture Creations Fine Designs Collection. I love all the beautiful swirls that show up once I used my Sanding Block to expose the core center of my paper.


I placed the burnt orange embossed paper onto a brunt orange and brown cardstock base and then layered my sentiment on top with some Foam Mounting Tape. I finished my card by adding a fun sheer bow and bird chippie around the sentiment.

Hugs,
Pammejo

Couture Creations Supplies:
CO723256 Fine Designs Collection - Exotic Embossing Folder
CO723040 Circle Nesting Dies
CO721996 Crystal Self-Adhesive Gemstones
CO721986 Handheld Essentials
CO721963 Foam Mounting Tape
CO721984 Double-Sided Tape
CO723060 Sanding Block
CO723039 Precision Trimmer
CO721957 Cutting Mat

Friday, November 15, 2013

The Greatest Love Card with Dana


Hi! Dana here today sharing a card that I created with the gorgeous Berardi Die from the Couture Creations Sophia Collection. I started by creating my own patterned paper with a heart mast and mist. I layered two pieces of that patterned paper for my card base. I cut the heart from pink cardstock using the Berardi Die. I backed the die-cut heart with white cardstock and secured it to the card base with Foam Mounting Tape.


I created a small embellishment cluster to hold my sentiment, which was created with cardstock, the second heart die-cut from the Berardi Die and a rub-on. I finished the card with some Moonlight Self-Adhesive Gemstones.

Thanks for stopping by today!
~Dana

Couture Creations Supplies:
CO723492 Sophia Collection - Berardi Die
CO721998 Moonlight Self-Adhesive Gemstones
CO721961 Foam Mounting Tape
CO723039 Precision Trimmer

Friday, November 8, 2013

Sophia Die Week - Ferretti Floral Card with Patti Hamil

Hi! Patti here today sharing a simple card I created with one of the Couture Creations Sophia Premium Intricutz Dies. There are some awesome and very versatile dies in this collection! I used the Ferretti Die for this card.


I cut 3 different colors of cardstock with the Ferretti Die and attached them to the card base with  Foam Mounting Tape for dimension. I offset each colorful row of flowers just a little so that each color is visible. I used the Scallop Square Nesting Die to create the little bottom border. I used some Crystalina Glitzin' Glamour Glitter Glue on the top layer of the die-cut blooms. I added ribbon, a title sticker and some faux stitching to finish the card.

The dies in this collection are just perfect for cards. They are versatile and can be used on layouts and other types of projects as well. Whatever you are making I'm sure you can find something in the Sophia collection that will work for you!

Thanks for stopping by!
~Patti 

Couture Creations Supplies: 
CO723487 Sophia Collection - Ferretti Die
CO723043 Scallop Square Nesting Dies
CO721971 Crystalina Glitzin' Glamour Glitter Glue
CO721961 Foam Mounting Tape

Thursday, November 7, 2013

Sophia Die Week - Happy Haunting with Pam Bray


Hi! Pam here today giving you a bit of Halloween inspiration. I am sure by now you have a few of your favorite Halloween photos printed and would like to do up a few layouts, so I would love to show you how I used some dies from the Couture Creations Sophia Collection to add some fabulous depth to my layout.


I used the Connexion Die at the top of my layout along with the Stella Die. I added a few roly poly flowers and placed a Vintage Gold Self-Adhesive Gemstone in the center of each of the flowers.


I used just the Stella Die at the bottom of my layout, and again, added a few roly poly flowers. I just love making them because they are so easy! Using one of the Circle Nesting Dies and your Sharp Point Scissors, cut a spiral into each circle you have die-cut. (I used the 2-inch circle Nesting Die for my flowers.) Then, using the tweezers from the Handheld Essentials Set, roll the paper into a tight circle and secure with a dot of glue.


I made a few flags and added them to my page. I adhered stickers to each flag with Foam Mounting Tape.


I fussy cut two images of a little girl sitting on a pumpkin and several postage stamps from patterned paper and created layered 3D embellishments by placing Foam Mounting Tape between identical images.

I hope you have enjoyed my layout and think about trying the Sophia dies on your projects!

Hugs,
Pammejo

Couture Creations Supplies:
CO723506 Sophia Collection - Connexion
CO723483 Sophia Collection - Stella
CO723040 Circle Nesting Dies
CO721990 Vintage Gold Self-Adhesive Gemstones
CO721986 Handheld Essentials
CO721963 Foam Mounting Tape

Wednesday, October 30, 2013

Dark Night Card with Dana


Hi! Dana here today sharing a Halloween card today. I embossed a piece of patterned paper with the Large Vintage Girl Embossing Folder and then highlighted the embossing with Black Soot Distress Ink. I love how the design form the Large Vintage Girl Embossing Folder frames the card edge.


I created a frame for the owl using the Oval and Scalloped Oval Nesting Dies. I attached all the elements to this card with Foam Mounting Tape for a fun 3D effect!

Thanks for stopping by today!
~Dana

Couture Creations Supplies:
CO723447 Elegance Collection - Large Vintage Girl Embossing Folder
CO723044 Oval Nesting Dies
CO723045 Scalloped Oval Nesting Dies
CO721961 Foam Mounting Tape
CO723039 Paper Trimmer

Wednesday, October 16, 2013

Dream Layout with Patti Hamil

Hi! Patti here today sharing a layout of my beautiful Granddaughter that I created using the Super Powder Puff Embossing Folder from the Couture Creations Fresh & Fun Collection. This design is such a super fun folder to play with. For this page I decided to add some color! I also added LOTS of layers!


Here is what I started with.


I colored in the designs with four pastel colored markers; green, pink, yellow and blue. I just used my Zig markers for this, which was really easy since the embossed area is so well defined.


Below you can see the cuts made with the Square and Scalloped Square Nesting Dies, which I layered underneath the photo using Foam Mounting Tape to add extra dimension to my page.


I used the Kaleidoscope Heart Die with three colors of cardstock. I backed each heart die-cut with cream cardstock to complement the little yellow fans I tucked behind each embossed square. I added Pink Diva Self-Adhesive Gemstones to the tip of each scalloped square framing my photo and some Crystalina and Pink Glitzin' Glamour to the flowers for some extra sparkle.


To finish the layout I added a tiny yellow rose at the bottom of each fan and a dream sticker sentiment.


This layout was so much fun to create and I hope you liked seeing it! Don't be afraid to add lots of layers and dimension to your pages. It really makes them come alive! Thanks so much for stopping by today!

~Patti

Couture Creations Supplies:
CO723441 Fresh & Fun Collection - Super Powder Puff Embossing Folder
CO723409 Endless Dreams Collection - Kaleidoscope Heart Die
CO723042 Square Nesting Dies
CO723043 Scallop Square Nesting Dies
CO721994 Pink Diva Self-Adhesive Gemstones
CO721971 Crystalina Glitzin' Glamour
CO721969 Pink Glitzin' Glamour
CO721961 Foam Mounting Tape

Wednesday, September 25, 2013

Get Rusty with Gloria

Hello everyone! Gloria here today sharing a fall-themed card.

I created a faux patina effect for this card. It is a fun way to get more use out of your folders! I used the Endless Embossing Folder from the All Occasions Collection.


Use a brayer to add ink to the embossing folder. I used a selection of fall colors of dye ink. Make sure you add ink to the inside of the folder, on the section containing the black Couture Creations logo. Place cream cardstock into the folder and emboss. Wash your folder to prevent staining. Use a heat tool to make sure the ink on the cardstock is totally dry.


Create a "patina" by using a foam or sponge ink applicator to ink over the raised areas of the embossed paper with green, blue, and dark brown ink, in that order. Allow to dry. You may use a heat tool to dry the ink if you wish.


Ink some of the raised areas with watermark or clear embossing ink. You only want to heat emboss a few areas to create a "rusted" look on your card. Emboss with metallic embossing powder. I created my own "rust" powder by combining several powders together. Trim the paper to size and use it to create a card.


I cut out the sentiment with the Rectangle Nesting Dies and Scallop Rectangle Nesting Dies and attached it to the card with Foam Mounting Tape.

Thanks for joining me today!

Couture Creations Supplies: 
CO723046 Rectangle Nesting Dies
CO723047 Scallop Rectangle Nesting Dies
CO723294 All Occasions Collection - Endless Embossing Folder
CO721956 Sharp Point Scissors
CO721986 Handheld Essentials - Embossing Tool
CO721965 Double-Sided Tape
CO721963 Foam Mounting Tape
CO721957 Cutting Mat

Friday, September 20, 2013

Smile with Pam Bray


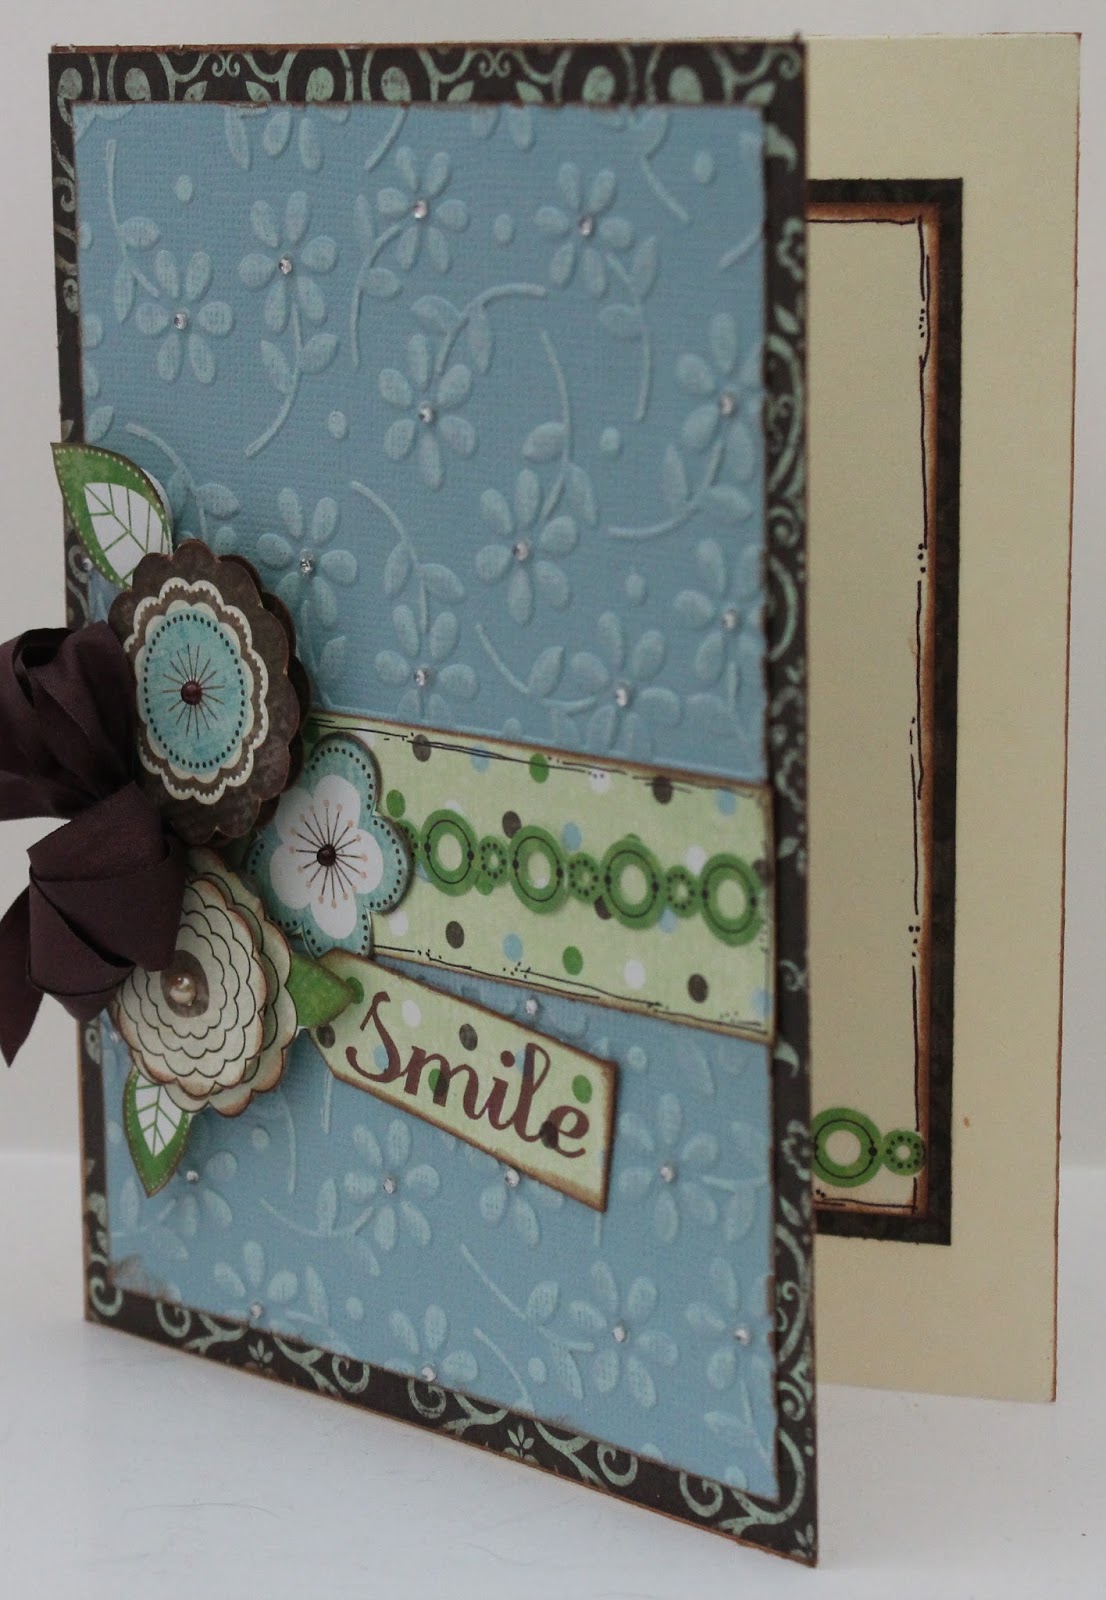
Hello! Pam here today sharing with you my "Smile Card" using the Couture Creations Petal Pleasures Embossing Folder from the Fresh & Fun Collection. To begin with I went to the archives of my mass paper stash and found some Bo Bunny papers that I had forgotten about....I am sure if you are a paper crafter/scrapbooker you understand what I mean by the "archives" of paper stashes....anyway...I began by placing my patterned paper on top of a 4" x 5 1/2" piece of kraft paper.


I ran my Couture Creations Petal Pleasures Embossing Folder through my die-cutting machine using Core'dinations Color Core Cardstock. Once I had accomplished this, I sanded it lightly with my Couture Creations Sanding Block, and adhered it to the top of my paper with my 1/4" Double-Sided Tape. I placed small Clear Gemstones from Couture Creations in the centers of each of my flowers.


Add a fun strip of coordinating patterned paper and a sticker border to the center of the Petal Pleasures cardstock prior to placing your fussy cut flowers on to your card front with Couture Creations Foam Mounting Tape.

I hope you enjoyed my card today and that it made you smile.
Hugs, Pammejo

Couture Creations Supplies:
CO723273 Fresh & Fun Collection - Petal Pleasures Embossing Folder
CO721996 Clear Gemstones
CO721985 Double-Sided Tape - 1/4"
CO72`963 Foam Mounting Tape
CO721965 Sharp Point Scissors
CO721957 Cutting Mat
CO721986 Handheld Essentials
CO723060 Sanding Block

Other Supplies:
Bo Bunny Pattern Paper/Stickers
Blue Core'dinations Cardstock
Brown Satin Ribbon

Wednesday, September 18, 2013

Quick and Easy Embossing Designs by Gloria Stengel

Hello! It is Gloria with you today. I am sharing a "quick and easy" card! When I collect a new embossing folder, the first thing I do is emboss it, using whatever cardstock I have close by. I also will emboss various types of cardstock to get a feel for how the impression will look with different weights and textures of cardstock. As a result, I collect stacks of embossed patterns! It is easy to pair these embossed prints together to make quick cards!


To create this card follow these steps:

1. Make a 5 1/2 x 4 1/4 inch card from rust cardstock. Set aside.

2. Emboss metallic cardstock with the Extra Loren Embossing Folder from the Couture Creations Elegance Collection.

3. Using a Couture Creations Sponge Dauber, rub the metallic embossed cardstock with rust ink. Trim the panel to slightly smaller than the card front.

4. Emboss green cardstock with the Poetry Embossing Folder from the Couture Creations Elegance Collection.

5. Using a Couture Creations Sponge Dauber, rub the green embossed cardstock with green ink. Trim the panel to 4 3/4 x 3 inches and mat with rust cardstock. Attach to the left side of the embossed metallic cardstock.
 

6. Stamp a sentiment with brown ink and die cut with a Couture Creations Rectangle Nesting Die.

7. Mat the sentiment with a rectangle die cut with the Couture Creations Scallop Rectangle Nesting Die. Attach the sentiment to the other panels with Foam Mounting Tape.

8. Wrap twine around the embossed panels and secure. Attach the panels to the card front.

9. Tie a button onto the card with more twine.

You can create this same card with various embossed panels and stamps! Take a rainy afternoon to replenish your card stash with some quick and easy cards....using embossing folders, of course!

Thanks for looking!  
~Gloria (Scraps of Life)
 
Couture Creations Supplies:
CO723445 Elegance Collection - Extra Loren Embossing Folder
CO723285 Elegance Collection - Poetry Embossing Folder
CO723046 Rectangle Nesting Dies
CO723047 Scallop Rectangle Nesting Dies
CO721963 Foam Mounting Tape
CO721965 Double-Sided Tape
CO721956 Sharp Point Scissors
CO721957 Cutting Mat
CO723039 Precision Trimmer
CO723061 Sponge Daubers

Other: Cardstock: WorldWin Papers ColorMates Smooth and Silky Deep Terra-Cotta, ColorMates Original Light Totally Tan, Elan Metallics; Mocha Ink: Clearsnap, Colorbox Archival Tree Frog, Clearsnap Colorbox Chalk Burnt Sienna, Tsukineko Memento Rich Cocoa; Stamp: Stampin' Up; Twine: May Arts; Button: Unknown; Adhesive: Glue Dots Adhesive Dots

Monday, September 16, 2013

Song of the Sea Card with Dana


Hi! Dana here today sharing a card that features a piece of embossed aluminum today. I feel at home when I'm on the beach, and that was my inspiration for my project. I embossed a piece of aluminum with the Couture Creations Cheerful Embossing Folder, from the Elegance Collection, and added color with Lindy's Stamp Gang Madonna Robe Blue Gold Two-Toned Embossing Powder.


Step One: Add watermark ink directly to the inside of the Cheerful Embossing Folder, slip the piece of aluminum inside the folder and run the folder through an embossing machine. Remove the aluminum from the folder, sprinkle with embossing powder and heat to set. Note: If you are using an aluminum sheet, the metal will become very hot upon heating, so please be careful! Depending on which side of the embossing folder carried the watermark ink, either the embossed or debossed area will be colored.


Here is what my piece of aluminum looked like after embossing.


Step Two: Stamp a sentiment onto a piece of cardstock. Cut the sentiment from the cardstock with the Couture Creations Scalloped Oval Nesting Die. Apply ink to the sentiment using a Sponge Dauber and the metal die as a guide.


Step Three: Select a piece of patterned paper for the card base and randomly apply circles and stars from the Pink Paislee Luxe Rub-Ons Set.


Step Four: Assemble the base of the card. Add some chipboard pieces from the Pink Paislee Luxe Circles Set across the center of the card.


Step Five: Add an image, the stamped sentiment from Step Two and other embellishments to finish the card.

Thanks so much for stopping by today!

Couture Creations Supplies:
CO723282 Elegance Collection - Cheerful Embossing Folder
CO723045 Nesting Dies - Scallop Oval
CO723061 Sponge Dauber
CO721963 Foam Mounting Tape