Showing posts with label Heart Nesting Dies. Show all posts

Friday, February 14, 2014

Heartfelt Banner by Sue Smyth


Hi! Couture Creations Designer Sue Smyth here with you today sharing a little piece of eye candy. I love making banners! This banner could be used for Valentine's Day or for an anniversary.


The large heart panels are die-cut from white cardstock with the Hearts Nesting Dies.


First, die-cut five large hearts from white cardstock using the largest Heart Nesting Die. Ink the edges with red ink. 


For the second layer of the banner, die-cut five hearts from red cardstock with the second largest Heart Nesting Die and then emboss those hearts with the Cheerful Embossing Folder. Rub over the embossed hearts with a pearl paint. Once dry, mount the painted hearts onto the white hearts with Foam Mounting Tape.


Use the Kaleidoscope Die to cut four hearts from pink glitter paper to create the third layer of the banner. Mount each Kaleidoscope heart onto white cardstock and attach to the red hearts with 


Embellish the middle heart with paper flowers. For a shabby finish, dab the flowers with gesso. Add a chip word.


Use the Aurora Vine Die to cut leaves from green cardstock to tuck around the flower cluster. Tip:
Trim the die-cut leaves to create small leaflets that are easier to work with. Add bits of gauze and a resin heart to the flower cluster.


Place eyelets into each side of the hearts. String the banner together with wide organza ribbon embellished with pearls.


Finish the banner by embellishing the Kaleidoscope hearts with Moonlight Self-Adhesive Pearls
and white fiber.

Happy crafting!
~Sue 

Couture Creations Supplies:

CO723530 Secret Treasures Collection - Aurora Vine
CO723409 Endless Dreams Collection - Kaleidoscope Heart
CO723213 Heart Nesting Dies
CO723282 Elegance Collection - Cheerful Embossing Folder
CO721998 Moonlight Self-Adhesive Pearls
CO721962 Foam Mounting Tape


Wednesday, February 5, 2014

Lacy 8 Valentine Card with Vicki Robertson


Hi! Vicki here today sharing a card that I created with a new dies from the Couture Creations Madeline Collection. With Valentine's Day a week away, it's time to roll out that special Valentine for the one you love! I created this card using the new beautiful Lacy 8 and the Hearts Nesting Dies.  This one is for my sweetheart. I'll save the sentiment for inside!


The card base of white cardstock is layered with both pink and white/gold foil heart patterned paper from the Teresa Collins You Are My Happy Collection. I used the Lacy 8 Die with the gold glitter paper and the Hearts Nesting Dies with the pink glitter paper. The Lacy 8 is a two part die consisting of an outer frame portion and an ornate inner circle. 


After adhering the frame to the card, I centered the large pink heart in the open circle area.  Next, I applied Foam Mounting Tape to the back of the ornate circle portion of the Lacy 8 die-cut and adhered it over the heart. I double layered two smaller die-cut hearts and placed them over the center opening of the ornate circle with more Foam Mounting Tape.

To further embellish the card, I added Moonlight Self Adhesive Pearls to the 4 corners of the frame, added a bow, flowers and a couple of stick pins. 

I hope you enjoyed my Valentine inspiration!

Couture Creation Supplies:
CO723241 Madeline Ornamental Lace Die Collection - Lacy 8
CO723213 Hearts Nesting Dies
CO721967 Cutting Mat
CO721962 Foam Mounting Tape (6mm)
CO721956 Pointed Stainless Steel Scissors
CO721998 Moonlight Self Adhesive Pearls

Other Supplies: Glitter Paper: American Crafts, Recollections; Patterned Paper: Teresa Collins; Roses: Recollections; Stick Pink: Close To My Heart; Bow Maker Tool: Craft-Dee BowZ; Other: Stick Pin, Satin Ribbon

Friday, October 18, 2013

Baby Keepsake Exploding Box by Jo Piccirilli

Hi everyone! Jo Piccirilli here today to share with you a little off-the-page project using lots of Couture Creations goodness.


Recently, the lady across the road had her 4th baby girl, so instead of a traditional present, I thought I would make a keepsake. This is an exploding box. There are lots of tutorials on Youtube on how to make these.

On the lid I have used the Alcyone Doily Die from the Royal Jewels Collection and the Tranquility Die from the Endless Dreams Collection along with some paper flowers.

On the outside of my box I have used the lower half of the Petite Fleur Embossing Folder from the Romantique Collection.  This folder was fantastic to use as it has a line of embossed dots that gave me a guideline for placing my pearls.

The inside of my box reveals a cake made with my Circle Nesting Dies.  I also used these and my Scallop Circle Nesting Dies to make the photo mats. 


Here is a quick run down on how to make the cake.

I cut two circles with my Circle Nesting Dies

Then, I cut two long strips.  The width will depend on how tall you want your cake to stand. Then, score two lines approximately 1cm in from each end.

Once you have scored your lines, you will then need to cut little triangles out. Just cut up to the score line. This makes it much easier to get your paper to bend around the circles you have just cut.


You can now pop a small amount of glue onto the circle and start and wrap the snipped strip around.  When you get to the end just snip off the extra length. You can now place these circles in the middle of your box.


Here is a closer look at the cake.


For the inside photo mats I have used the Large Damask Flourish Embossing Folder and the hearts from the Hearts Nesting Dies.


This was heaps of fun to make.  I hope I have inspired you to have a give a go at making your own exploding box. The designs are endless!

Until next time,
~Jo


Couture Creations Supplies:
CO723449 Elegance Collection - Large Damask Flourish Embossing Folder
CO723165 Romantique Collection - Petite Fleur Embossing Folder
CO723222 Fantasia Collection - Ivy Set Doily Dies
CO723213 Heart Nesting Dies
CO723040 Circle Nesting Dies
CO723041 Scallop Circle Nesting Dies
CO723046 Rectangle Nesting Dies
CO723112 Royal Jewels Collection - Alcyone Doily Die
CO723435 Endless Dreams Collection - Tranquility Decorative Die
CO723412 Endless Dreams Collection - Magical Butterfly Die

Monday, July 8, 2013

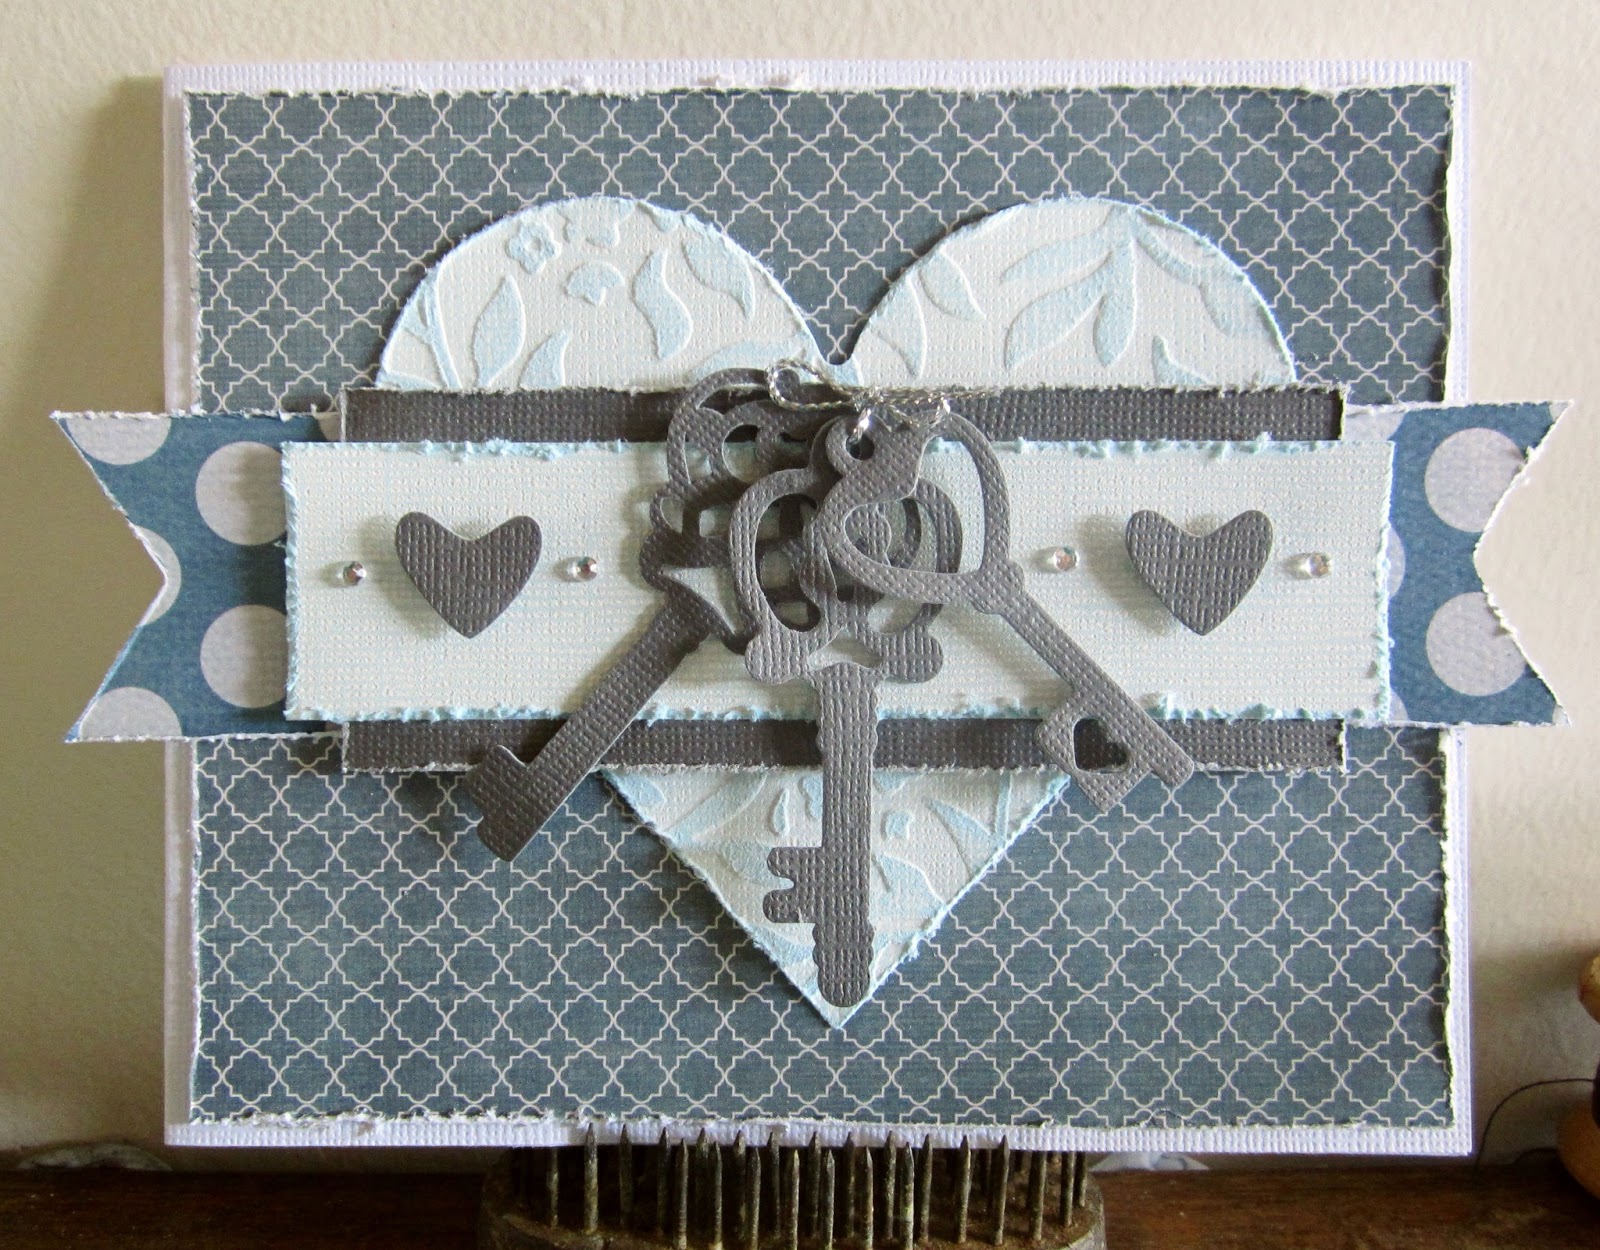
Couture Creations Endless Dreams - Decorative Key Card

Hi, Kerrie Gurney here today for CSW Distributors!


I'm using the fun decorative key dies from the Couture Creations Endless Dreams Collection for the focal point of my card. You can use keys on so many projects!  I thought I would do a quick card that can be used for any occasion. Cut the card base to 12" x 5" and fold in half. Cut a piece of patterned paper to 5 3/8" x 4 3/8" and adhere to the card base.


Die-cut a heart using a piece of Core'dinations Cellar Door Whitewash Cardstock and a Couture Creations Heart Nesting Die. Emboss the heart using the Couture Creations Extra Loren Embossing Folder. Gently sand the heart to reveal the blue core color.


Die-cut one of each of the decorative keys in grey cardstock using the Couture Creations Aladdin, Baroque and Key To My Heart Dies. Cut several strips of paper; a piece of patterned paper to measure  7" x 1.5," a piece of grey cardstock to measure 4.5" x 1 3/8" and a piece of Whitewash cardstock to measure 5 1/4" x 1."


Distress all the edges of the paper strips using scissors or a distressing tool.


Die-cut another key from the Key To My Heart die. You will use the heart shape from the center of both dies. Layer all the pieces onto the card base. Use Foam Mounting Tape on the grey strip of cardstock to add some dimension to the card. Tie the keys together using silver cord.


Use Foam Mounting Tape behind the heart accents. Finish the card by adding some Couture Creations Crystal Gemstones.


Couture Creations Supplies:
CO723417 - Endless Dreams Decorative Die, Aladdin Key
CO723419 - Endless Dreams Decorative Die, Baroque Key
CO723418 - Endless Dreams Decorative Die, Key to My Heart
CO723445 - Elegance Embossing Folder, Extra Loren
CO721996 - Gemstones, Crystal
CO721955 - Pointed Non-Stick Scissors
CO723060 - Sanding Block
CO721961 - Double Sided Foam Mounting Tape 12mm
CO721985 - Double Sided Tape 6mm
CO721954 - Precision LED Tweezer

I hope you have enjoyed this tutorial!  Happy Creating!